I decided it was time to upgrade my Tyvek Solo Fire Shelter into something much better and which could accommodate two – and dogs! I also wanted to use my Hole-Less Poncho Shelter as the floor. Such instructions as there are so far are can be found in these two posts. Both ideas evolved from this idea Pitching the Poncho and go way back into last century.
I intended that this should result in a ‘roof’ (in 1.85 oz Tyvek for its ‘fireproofness’) that was around 400 grams, and a poncho ‘floor’ in 1.3 oz silnylon that would be around 170 grams. Adding another 80 or so grams for tent pegs should still result in a tent which was under 600 grams, and fit for all weathers. It would also provide a raincoat (maybe a spare) which would otherwise weigh maybe half the weight of this tent!
(I realise now – 2020 – that I can ‘stretch’ my Pocket Poncho Tent to make it big enough for two and make it from .77 oz material (so it will weigh around 110 grams). If each of a pair carries one they would have both a tent and a floor for 220 grams (plus pegs_ – say around 300 grams all up – and they would double as raincoats. This idea is ‘on its way’. All these permutations are basically evolutions of the same idea, but unfortunately they happen rather slowly).
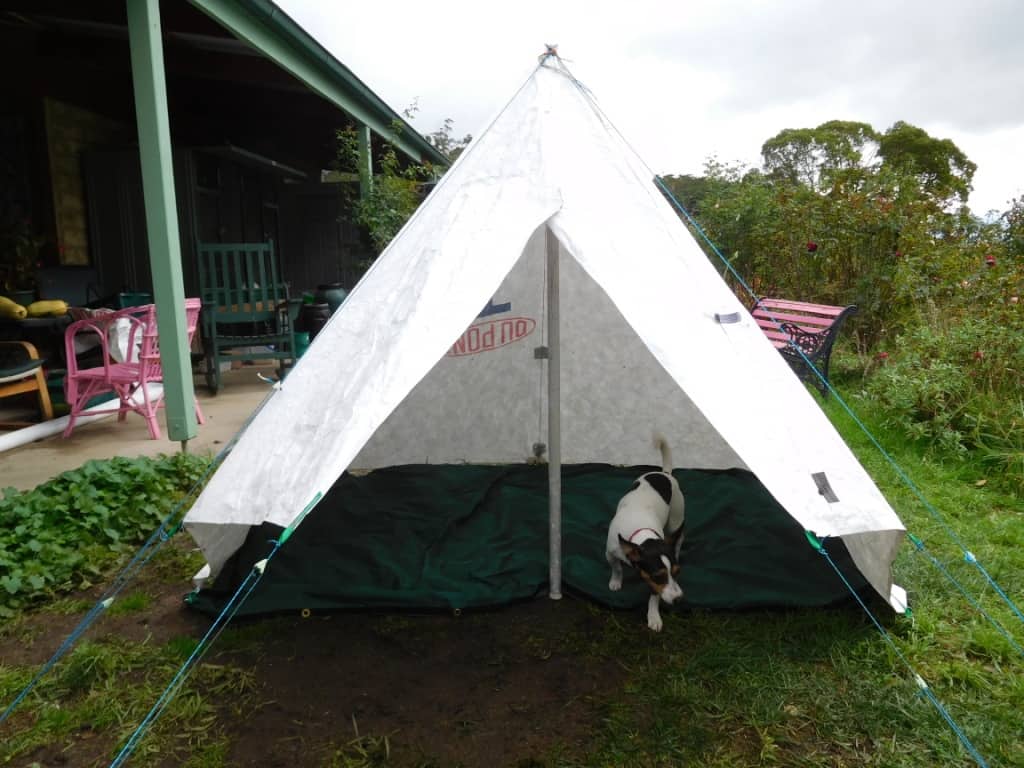
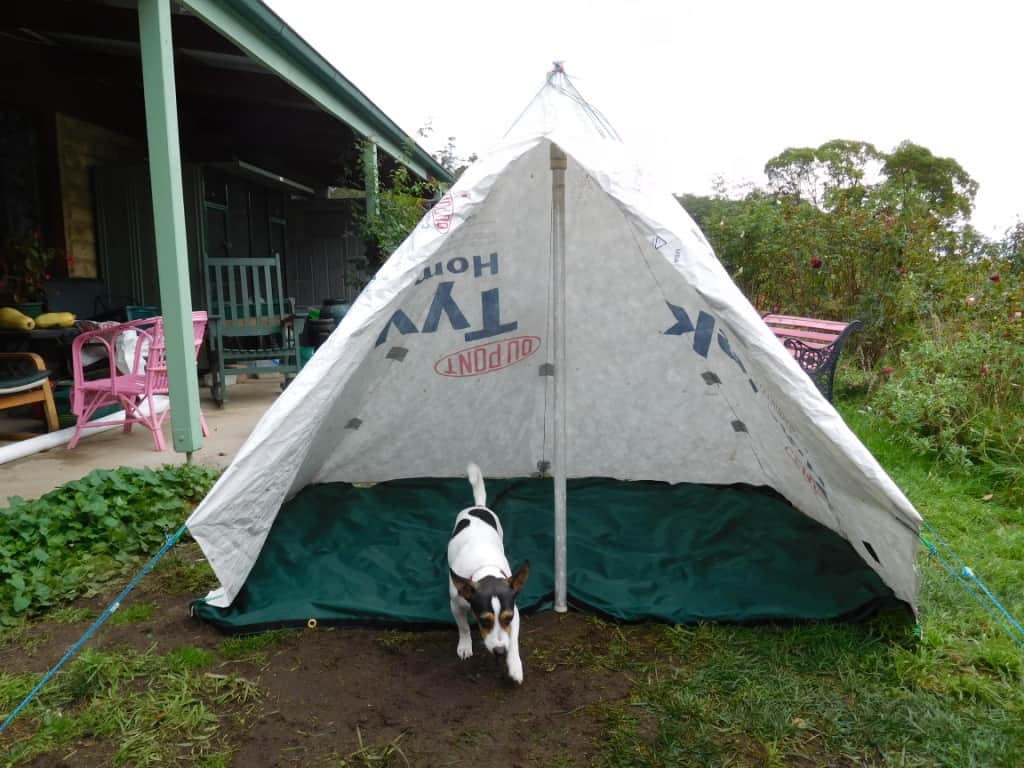
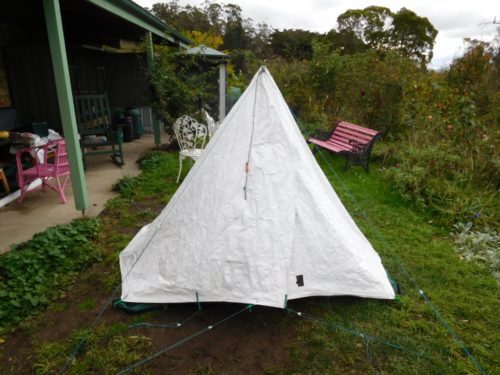
This Deer Hunter’s Tent #1 tent uses only one 5′ pole (probably a stick found up the bush). I have now actually sewn in a Tyvek floor in this prototype, which proves to me that my weight calculations are right, and that the tent works perfectly. Of course I want to try it out on a few more expeditions before I finalise the design. I am thinking of making it a bit longer. The solo was the minimum length for me (I am 5′ 8″) but was a bit shorter than is comfortable really. I may go out to 7’6″ or even 8′ later.
Try making this one first. It will only cost you $10: http://www.theultralighthiker.com/poly-tent-by-the-ultralight-hiker-on-the-cheap/
‘Imitation is the sincerest form of flattery’ as they say. Be that as it may, Six Moon Designs now offer what is pretty much this same design for US$185 (May 2022): The Deschutes Tarp It weighs 13 oz – 370 grams (roof only) and has 44 square feet of coverage. As it is (clearly) made of 5′ wide material the top is closer to the edge than in my tent. I have long realised this disadvantage of ‘pyramid’ tents ie that it is very difficult to have them open without the danger of rain in the tent. By making the back longer and basically pushing the pyramid over (and by adding a small triangular closure at the top of the open side I avoid this.
Another alternative is the Aricxi Tarp (below) which will only set you back about $50 (and weighs even less). Also much more suitable for a fire out the front and more likely to keep you dry without shutting it down. I have pitched it too high in the photo (because I hate having to bend down low to get in tents. It pitches much better wider and lower..
The photo below (from The Last of the Mountain Men) shows the version with sewn in floor and floored vestibule area:
I have now discovered some 1 oz/yd2 silnylon which is reasonably priced at $11.95 a metre (http://www.theultralighthiker.com/australian-outfitter/) so that I can make the whole thing much lighter (55% of the weight, ie under 400 grams all up). I have made the Siligloo and the Pocket Poncho Tent from it, and am very pleased with them/it. I have now (2022) weighed the above silnylon and found it is actually 1.3 oz/yd2. Ripsopebytheroll have a .93 ‘Mountain’ silpoly which I have used in another project and found very suitable. They also have an allegedly stronger and lighter .77 oz silpoly fabric.
I have just been making a new version of this tent in some 1.25 oz silnylon I bought from China for $4/metre. This makes a roof at exactly 274 grams ( have weighed it) in a stretched version which I will be posting about soon (plus patterns to download). It allows for a ‘bed’ area of more than 7′ x 5′ plus a vestibule, so about 45 square feet all up.. This roof area would weigh 205 grams in the .93 oz fabric (US$8/yd) and 170 in the .77 (US$16/yd). I doubt the double cost is worth the 30 grams saving. When I add a floor to the existing roof the whole thing will weigh around 420 grams (including tie-outs). In the .93 fabric the tent with floor it will weigh 304 grams (250 for the .77 oz)
In cuben you could go even (slightly) lighter but it is very expensive at around $30/yd (http://www.zpacks.com/materials.shtml)and very fragile. I have a piece I can salvage from another project so I may make a cuben model with a .93oz silnylon poncho floor – I expected the whole thing (including floor) would weigh under 250 grams after I have made another one in Tyvek to get the measurements just exact. This one was the prototype. Not bad for a two person tent though!
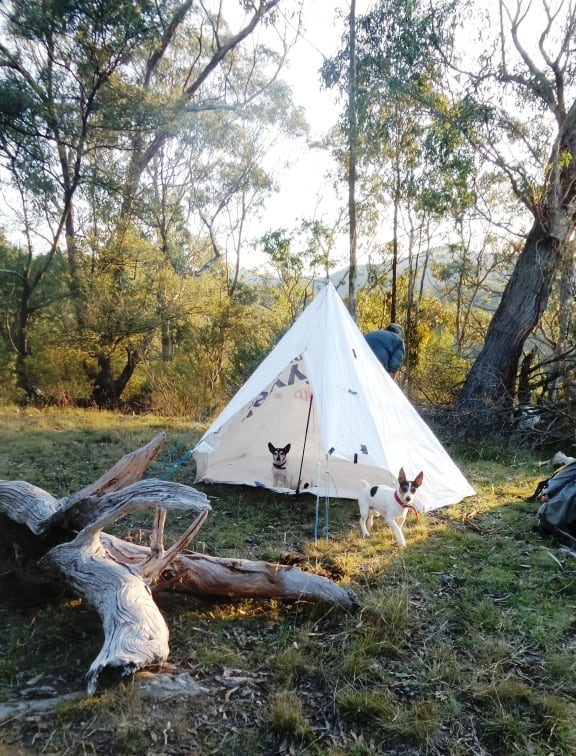
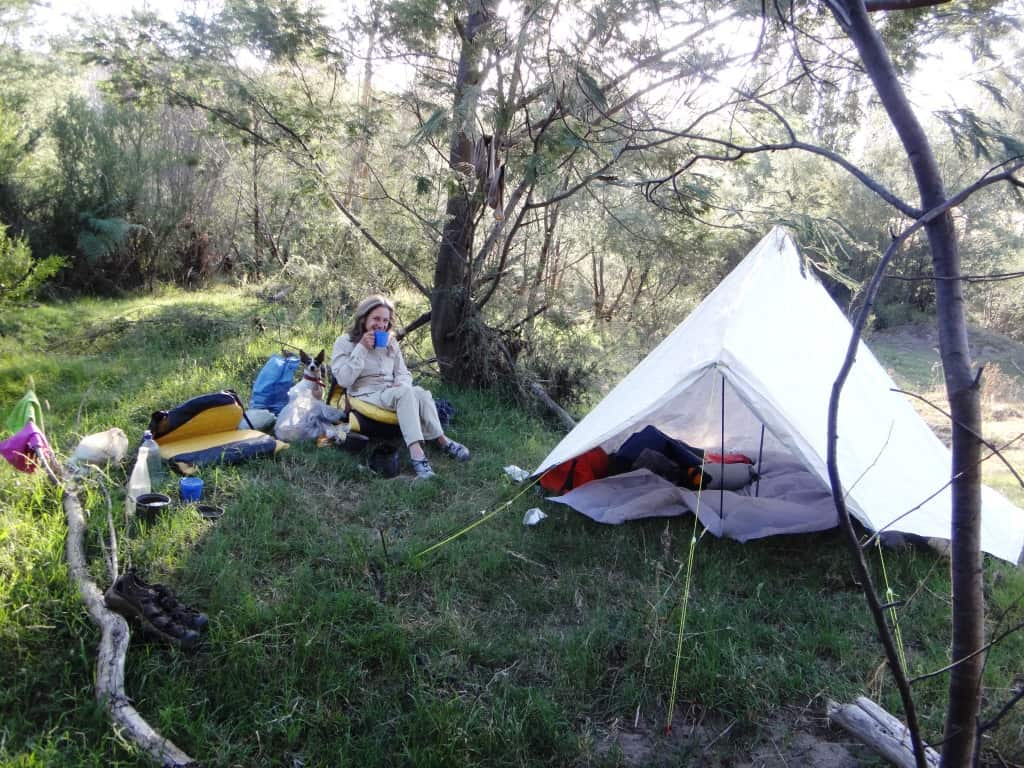
The waterproof section of the floor would only be roughly 5’ by 7’ ( or anyway the size of the poncho), less a bit so that you get a ‘bathtub floor’ effect (if you use a poncho). However, there is also a floorless ‘vestibule area of about 7 square feet for dogs, and gear stowage. I expect if you are vertically challenged like us you will have plenty of room to shove bits and pieces at the ends and side. We will fit. That’s my old poncho in the cover photo and at the bottom. The mitten hooks and material have not yet arrived (tomorrow I expect) to make my new one and attach it to the tent to make the floor. It will create a bathtub floor 4’6″ x 6’8″ x 2″ deep.
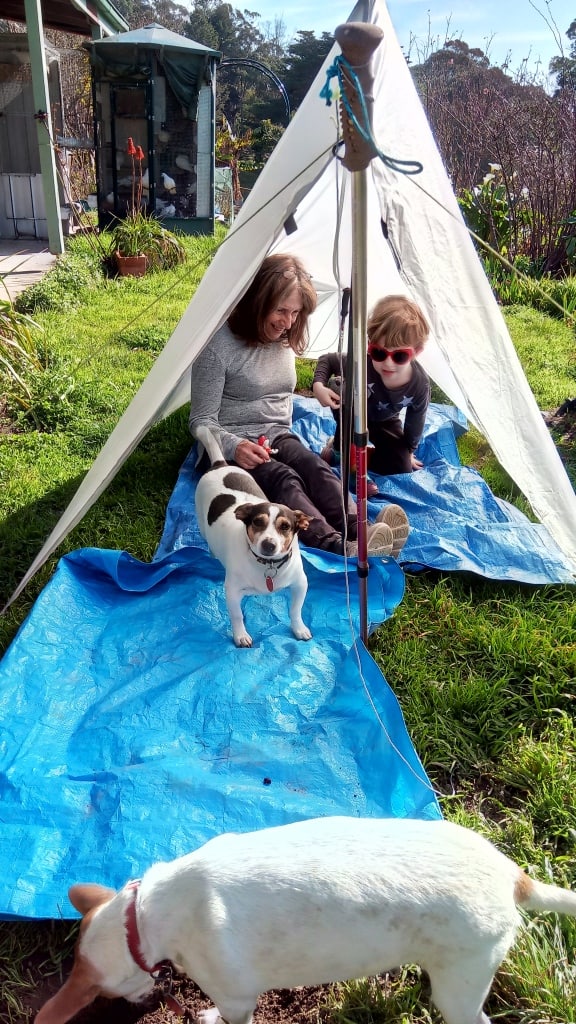
It was extremely windy when I took the photos below but it is showing no inclination to fall down – and it went up in seconds! That’s what I like. It is also raining but it is nice and dry inside. As with all my tents it is intended you will warm it with a cosy fire out the front, a nice touch if you are enjoying winter hunts in Gippsland, as I will be doing. Sparks from a fire never melt a hole in Tyvek which has an ignition temperature about 900F (400C).
There are three different modes. The ‘normal’ fully open mode which will be easiest to get into. The peak is 5’ high. The rainy day mode where you can half close it yet have the entire floor stay dry but still enjoy the benefits of the fire. The storm mode for when it really wants to blow and bucket down and you need to keep it all out and keep the tent from blowing away. If much taller tepees withstood the winds on the Great Plains for centuries I expect this little guy will withstand a rainy night or three in Gippsland! I will figure out how to put a couple of vents in the top for when it is in storm mode. (Have figured out)
Just picture yourself sitting in there in front of a warm fire on your Cyclone Chair: http://www.theultralighthiker.com/cyclone-chair/
PS: We have been out and about to test out the new tent. See The Last of the Mountain Men and it worked well. It doesn’t pay to rush into things though. I have been thinking some more about the Cuben Fibre version of the tent and have realised two things: 1. I can make the tent bigger than I envisaged with the poncho floor. For some reason I was thinking of the floor as stretching across from the widest parts of the tent which is just not so.
Changing this will increase the floor area quite a lot. 2. I now also realise I can devise a bug screen which can be deployed when using the poncho for a floor. The bug screen will add only about 40 grams. It will consist of a 6″ ‘skirt’ of flyscreen which drapes down onto the poncho, and at the front two overlapping ‘wings’ which you push through to get in/out. No zips to break. It will keep out 90%+ of the nasties. I will be making another Tyvek version (someone could get lucky!) to get the dimensions/details just right before I make a silnylon version or use up my very expensive cuben.
In the meantime, this one is really easy to make and works well: http://www.theultralighthiker.com/honey-i-shrank-the-tent/ Here is a photo of it taken on our recent canoeing trip; http://www.theultralighthiker.com/wonnangatta-waterford-to-angusvale-day-one/
Below: the ‘Honey I Shrank’ Tent on the Wonnangatta/Mitchell, Gippsland, Victoria, Australia.
Here are the photos of the first prototype I mentioned above. Top:
Open Mode: As you can see, it has Spot’s ‘seal of approval’.

Half Open Mode.
Storm Mode.

Side View.

Rear View.
Check out my new version of this tent here:
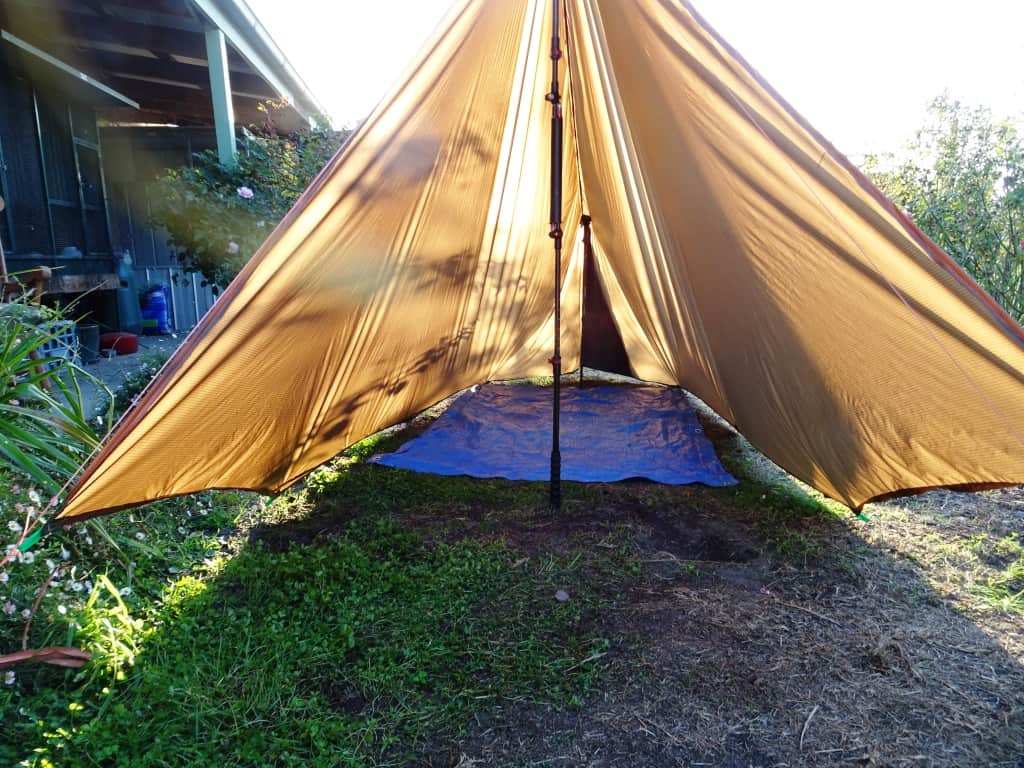
which in turn I have shrunk a bit into The Grey Flyer The beauty of this new tent is that it doubles a s a hammock tarp even for two.
This idea (of a tent which doubles as a tarp evolved out of my 10 x 10 Tarp. You can buy a very similar tarp (and pitch it ‘my’ way) from Alton Goods for US$139.
First Published May 12, 2016
See also:
http://www.theultralighthiker.com/new-decagon-octagon-tyvek-igloo-tent-design/
http://www.theultralighthiker.com/honey-i-shrank-the-tent/
.http://www.theultralighthiker.com/the-deer-hunters-tent/.
http://www.theultralighthiker.com/does-spot-like-to-hunt-deer/
http://www.theultralighthiker.com/tyvek-solo-fire-shelter/
http://www.theultralighthiker.com/tyvek-tent-designs/
http://www.theultralighthiker.com/tyvek-twin-fire-shelter/
http://www.theultralighthiker.com/one-pole-tyvek-tipi/
http://www.theultralighthiker.com/tyvek-bivi/
http://www.theultralighthiker.com/new-tyvek-forestertent-design/
http://www.theultralighthiker.com/tyvek-jack-russell-rain-coat-13-grams/
Instructions will be added later – as might the facility to buy one.
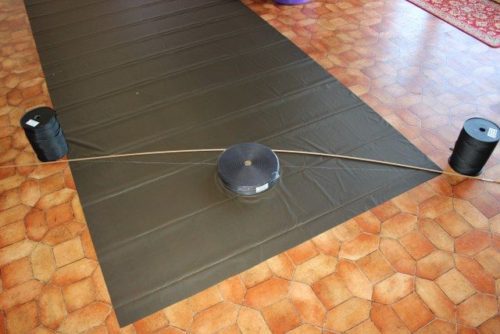
For now, what I did to make this version: sewed on the entrance flaps (as per instructions here: http://www.theultralighthiker.com/tyvek-solo-fire-shelter/) then set the tent up 5′ high with tarp clips configuring it around the dimensions of the poncho which I marked on the ground (with tent pegs). I also wanted the tent to tie out more tautly so I extended the tie down point at the rear by 3″ and the middle side tie down points by the same amount. I moved the two front side tie down points to exactly conform to the dimensions of the poncho, then I brought the two front flaps together about 15″ out from the pole and cut off the bottoms. Before I cut off the sides of the front flaps I pegged them out into the half open position and pinned them together about 18″ forward of the peak so as to make a rain shelter at the front when the tent was open.
I marked a position to sew a pocket to take a pole at the inside of the peak. I also marked a point on the roof to sew in a loop to hang my torch from. Taking the tent down, I laid it out on the floor and made sure that the sides were symmetrical and marked catenary curves along the bottom sections allowing a curve of about 1″-1 1/2″ in the centre of the curve. When I had sewn in the new tie downs, pocket etc I set it up again and added some stick-on Velcro for the door closures. I will recalculate all the dimensions and make a wholly new model (soon).
On this prototype which turned out to be slightly smaller than the poncho and what it can be, I sewed in a Tyvek bathtub floor (approx 210 grams) just to see how that works. I had to cut a piece which is slightly bigger than the tent floor then set the tent up on top of it, then carefully trimmed and pinned so that the floor was always bigger than it needed to be (this may mean a little excess at the corners) so that the floor doesn’t hinder the tent’s pegging out nice an taut
I have now included a floor for the vestibule. I may also add some .7oz/yd2 nano bug mesh to the outside of the vestibule so that one can enjoy a night without beasties biting. This will add little more than an ounce. All the same it will be nice to have a tent which goes up in seconds (just right) and is ready to move right in. This tent goes up so fast I can imagine putting it up for lunch on wet days!
NB: Here is a neat way to do the catenary curves: (http://www.tiergear.com.au/25/-make-your-own-adventure-blog) ‘using a length of 6mm dowel (or some other equivalent), and some heavy weights to keep it in place position the dowel so that it intersects the two corners and the mid catenary cut mark, and draw a line along the dowel.’
PS: The tent has stood up perfectly to several very windy wet nights – it looks no different to what it did when I set it up. Inside perfectly dry.
As usual, make one of these for your own use but if you want to manufacture them, I would like some credit – and some cash, please! There is a donate facility at the bottom of the page.
PS: I am investigating having some of these tents etc made in Asia this year with a view to putting a shop front on the website and selling them. Just hang in there.
Some Other Hunting Related Posts (there are many more):
Adventures:
http://www.theultralighthiker.com/sambar-stalking-101/
http://www.theultralighthiker.com/does-spot-like-to-hunt-deer/
http://www.theultralighthiker.com/spots-hunting-adventures-1-mystery-river/
http://www.theultralighthiker.com/not-quite-alone-in-the-wilderness/
http://www.theultralighthiker.com/hunting-in-fiordland/
http://www.theultralighthiker.com/moose-hunting/
Survival:
http://www.theultralighthiker.com/finding-your-way/
http://www.theultralighthiker.com/how-to-light-a-fire-in-the-wet/
http://www.theultralighthiker.com/carry-a-knife/
http://www.theultralighthiker.com/how-to-treat-a-gunshot-wound-part-2/
http://www.theultralighthiker.com/how-to-avoid-being-wet-cold-while-camping/
http://www.theultralighthiker.com/river-crossings/
http://www.theultralighthiker.com/river-crossings-2/
http://www.theultralighthiker.com/emergency-dial-112/
http://www.theultralighthiker.com/rope-dont-leave-home-without-it/
http://www.theultralighthiker.com/home-made-pack-raft/
Feet:
http://www.theultralighthiker.com/784/
http://www.theultralighthiker.com/spare-shoes-great-for-river-crossings/
http://www.theultralighthiker.com/keen-shoes/
http://www.theultralighthiker.com/why-you-should-get-your-feet-wet-when-hiking/
http://www.theultralighthiker.com/foot-care/
http://www.theultralighthiker.com/ultralight-mitts-and-gaiters/
Tips:
http://www.theultralighthiker.com/ultralight-personal-hygiene/
http://www.theultralighthiker.com/insects-can-ruin-a-camping-trip/
http://www.theultralighthiker.com/leeches/
http://www.theultralighthiker.com/pack-weight-reduction-tips/
http://www.theultralighthiker.com/securing-hearing-aids/
Equipment:
http://www.theultralighthiker.com/308s/
http://www.theultralighthiker.com/bore-sight/
http://www.theultralighthiker.com/camera-clearviewers/
http://www.theultralighthiker.com/the-worlds-greatest-machete/
http://www.theultralighthiker.com/improvised-bow-saw/
http://www.theultralighthiker.com/lever-actions/
http://www.theultralighthiker.com/blr-lightning-rifle/
http://www.theultralighthiker.com/never-have-to-sharpen-your-knife-again/
Shelter:
http://www.theultralighthiker.com/the-deer-hunters-tent/
http://www.theultralighthiker.com/hammocks/
http://www.theultralighthiker.com/hammock-camping/
http://www.theultralighthiker.com/worlds-lightest-tarp-clip/
http://www.theultralighthiker.com/the-perfect-guy-line-for-a-hiking-tenttarp/
http://www.theultralighthiker.com/tent-stakes-and-tricks/
Hiking Gear:
http://www.theultralighthiker.com/dry-bags-sea-to-summit-ultra-sil-nano/
http://www.theultralighthiker.com/bush-shower-mechanical-advantage/
Comfort:
http://www.theultralighthiker.com/cyclone-chair/
http://www.theultralighthiker.com/best-sleeping-bag/
http://www.theultralighthiker.com/air-beam-pad/
http://www.theultralighthiker.com/ul-pillows/
http://www.theultralighthiker.com/new-hiking-mat-425g/
Dogs:
http://www.theultralighthiker.com/tyvek-jack-russell-rain-coat-13-grams/
http://www.theultralighthiker.com/ultra-light-dog-leash/
Packs:
http://www.theultralighthiker.com/the-ideal-pack/
http://www.theultralighthiker.com/ultralight-pack/
http://www.theultralighthiker.com/hunting-daypack/
http://www.theultralighthiker.com/ultralight-hunting-daypack-update/
Clothes:
http://www.theultralighthiker.com/hiking-pants/
http://www.theultralighthiker.com/rain-kilt/
http://www.theultralighthiker.com/new-cuban-fibre-raincoat/
Hunting/Fishing:
http://www.theultralighthiker.com/how-to-make-a-sling/
http://www.theultralighthiker.com/four-gram-fishing-handlines/
http://www.theultralighthiker.com/solunar-tables/
Cooking:
http://www.theultralighthiker.com/cookset-woes/
http://www.theultralighthiker.com/supercat-hiking-stove/
http://www.theultralighthiker.com/windscreens/
Food:
http://www.theultralighthiker.com/emergency-cb-radios/
http://www.theultralighthiker.com/tasty-hiking-meals/
http://www.theultralighthiker.com/dellas-coconut-rice-hiking-food/
http://www.theultralighthiker.com/lunch-on-the-trail/
http://www.theultralighthiker.com/hiking-food-2/
Water:
http://www.theultralighthiker.com/survival-still/
http://www.theultralighthiker.com/water-hiking-desalinator/
http://www.theultralighthiker.com/water-filter/
Thoughts:
http://www.theultralighthiker.com/free-willdeterminism/
http://www.theultralighthiker.com/you-will-not-live-forever/
4WD:
http://www.theultralighthiker.com/second-air-bead-locks/
http://www.theultralighthiker.com/twin-shock-absorbers/
http://www.theultralighthiker.com/enginesaver-low-engine-water-alarm/
Electronics:
http://www.theultralighthiker.com/mobile-phone-battery-life/
http://www.theultralighthiker.com/get-lost-get-found-plbepirb/
http://www.theultralighthiker.com/mobile-phone-antennae/
http://www.theultralighthiker.com/gotenna/
http://www.theultralighthiker.com/mobile-phones-apps-for-bushwalking/
http://www.theultralighthiker.com/mini-super-torch-a-weeks-light-weighs-50-grams/
http://www.theultralighthiker.com/single-aaa-head-torch/
http://www.theultralighthiker.com/eneloops-rechargeable-batteries/
http://www.theultralighthiker.com/does-spot-like-to-hunt-deer/
Hello
When you mention that Dyneema is “fragile” when used as a tarp material what exactly do u mean by that? My understanding was that it is quite strong and resistant to puncture? Further to that how would you rate tyvek, silnylon, and dyneema for tarps/shelters. Obviously they all have different qualities, overall do you feel that there is a best/ ultimate material?
I mean to do a post on why I have completely abandoned dyneema. First the waterproof membrane is just a piece of very light plastic film bonded to the dyneema fibres. It is so easy to get a leak. The material has very little strength and will pull apart. With just a little wear an tear this is just what happens: it shreds to bits. It is just not worth the money or the small saving on weight. Tyvek is quite heavy and not being woven will tear apart too. I just use it mainly for prototypes (because of its 10′ width) and because of its excellent fire resistance. You can’t beat the various types of silnylon. One with urethane on one side and silicone on the other is probably ideal. For lightness and strength the ‘Mountain’ Silnylon from RipstopbytheRoll is excellent. Cheers, Steve.
Hiya, Steve!
I’ve been so inspired by your tents that I’ve got a bit of Tyvek coming in the mail. My research tells me that I’ll have to be smart about my grommets/timeouts. What’s your trick? I’ve zoomed in on all of the pictures but I can’t quite see how the tieouts work.
Hi Dennis, Thank you. Grommets won’t work. You need to reinforce where you have the tie-outs.I sew (or tape) that piece on before I do the hem so that the hem then has four thicknesses, then I sew the gross grain ribbon to (& along) the hem leaving a loop for the tent peg or guy. Hope that’s clear. Cheers, Steve.
Hey Dave,
Fantastic little resource you have here! Just wondering whether you’ve progressed to putting out kits for the Deer Hunter Tent? Am very keen to pick one up if you have, or otherwise swing you some $$ for the blueprint if you’re happy to go that way
Hope all is well!
Tom
Hi Tom, I haven’t yet, but I am just about to make a new model which will be slightly bigger. I will give it some htought after I have made and posted about it. Cheers, Steve. PS: In the meantime, why not try one of these: https://www.theultralighthiker.com/2018/09/17/two-great-cheap-tents/
Hi Steve,
I’ve been looking at your tents and would also love to get a kit/plans off you for the deer hunter tent with bathtub floor and insect screen. I live in Yarram and work in Traralgon, it would be great if I could meet you and see the great items you’ve made first hand. I have been searching the Internet for lots of styles of tarp/ tents like yours.
Kind regards
Adam
Thanks Adam, I am still working on a final version of this tent and also plans to have them manufactured. This may come to nothing…but I will be trying to have something happen this year. Cheers, Steve.
Hi Steve,
Have enjoyed reading about your ramblings and practical soloutions.
I’m very interested to see your Deer Hunter tent in CF ?
Have you had time to make one yet, bath tub floor, with insect mesh at opening would be highly practical
Regards
JD
Hi John & thanks, I will be doing this (eventually). I have still (at least) one more prototype of it to make it just a little bit bigger. I will want it before next winter if I can. I also want to make the poncho up so I can know I can use it as a floor – also a ‘to-do’ even though I know all these things definitely work. The same applies to making a silnylon version of the ‘Honey I Shrunk’ tent which I also have bought the material for. I am also playing around with maybe two versions of my existing cuben tarp as seen here: http://www.theultralighthiker.com/hammock-camping-double-bunking/ I realise it can be both a dry tent for one at least and a hammock tarp (ditto) if it is just an 8′ square with four 2′ long right angle triangles sewn in two opposite corners – even in torrential rain, and even in Fiordland (and still weigh only a bit over 150 grams). If I sew two more 8′ x 4′ squares to it (as it is in the pictures) on the opposite corner then it can become a huge dry tent for two and also an impregnable hammock tent for two and still weigh less than 250 grams!. But I will need a bathtub groundsheet. I have just ‘invented’ a bathtub groundsheet as it happens, but I have still not played with any of the materials I need to use to see whether it will work exactly as I envisage. So, it is still in my head, but you can expect to see a prototype sometime in the future – also an inflatable dog bed and an inflatable quilt! Strangely it can take a while thinking about things before a solution pops into my mind, old as I am. So, in answer to your very welcome question, I am slowly working my way through all these designs. I also need to come back to the Forester tent sometime and complete it, as it was my old favourite. There is also some fun (and some adventures) to be had, some river and track clearing – and lots of work around the house and farm. Unfortunately I have had over a month of ill-health. Damn-it! (Mostly the pneumonia from Everest – and now another cold turned to a chest infection again!) I cannot imagine what ‘real’ retired people do. They must be horribly bored. Cheers, Steve.
Hi Steve – that tent looks really good.
Thank you Simon. I will be ordering some of your excellent 1 oz/yd2 silnylon to make a tent this week and some of your 1.35oz/yd2 for the floor plus some other ‘bits and pieces’ What a great store! (http://www.tiergear.com.au/). It will be this tent: http://www.theultralighthiker.com/honey-i-shrank-the-tent/
Hi Steve,
This looks great, would be keen, it’s so light, could just keep in stalking pack!
Thanks Jake.
hi how do I purchase the complete kit with instructions to make the deer hunters tent with the floor looks fantastic
Hi David, I was just ‘testing the water’ with the kit offer, but if there is some more interest such as yours, I will go ahead initially in Tyvek, then later in Silnylon &/or Cuben. I need to make a couple more myself to get the exact dimensions right (and the instructions), but I will do so and will get back to you when I have them ready to go. Cheers, Steve.
Thanks steve can i buy the tyvek from you or can you tell me where i csn get it
You can buy a 3m x 30m roll from Home Hardware for @ $230. If I do kits I will supply all the materials and the pattern/instruction with the kit.