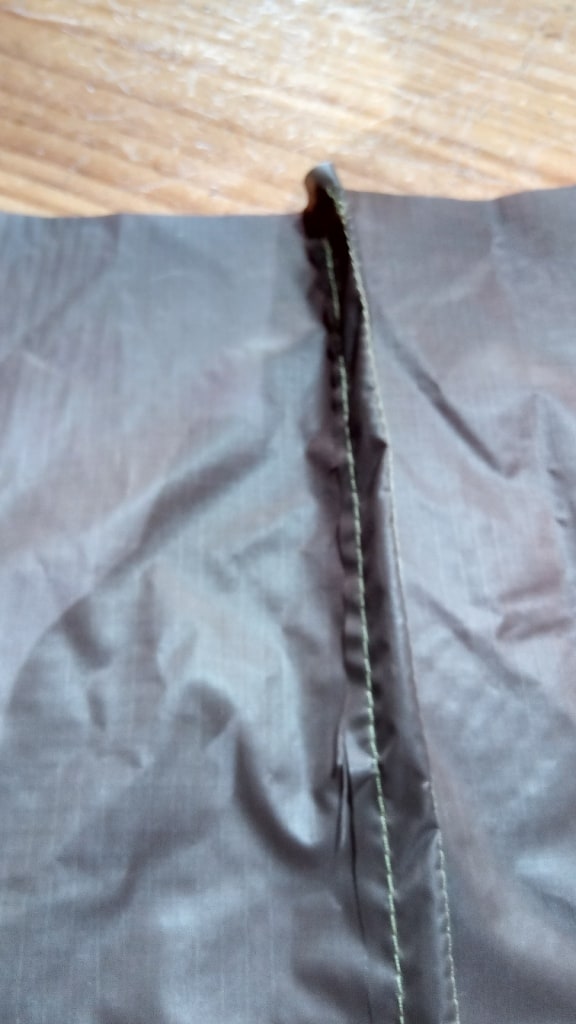
If you have sewn a couple of tents or similar projects you will no doubt have encountered this well-nigh compulsory seam. It is awkward to do. The cutting is tedious, the folding over is really difficult when you have ‘hands like feet and feet like No 10 shovels’ as I do, and the results are often not very desirable. Besides, the material is not very satisfactorily joined. It wants to open up on one side and it is difficult to keep it waterproof.
I have discovered a much simpler way of joining two pieces of fabric to make a tent or tarp. No doubt others have discovered it before me and it has a name, but I just hit on it because I was fiddling around working on a new tent, so here it is.
It is much easier, gives a nice flat seam. The raw edges are sealed away inside. The material is sewn through several times so it is strong. It should be waterproof. The material does not pull open at the edges of the seam.
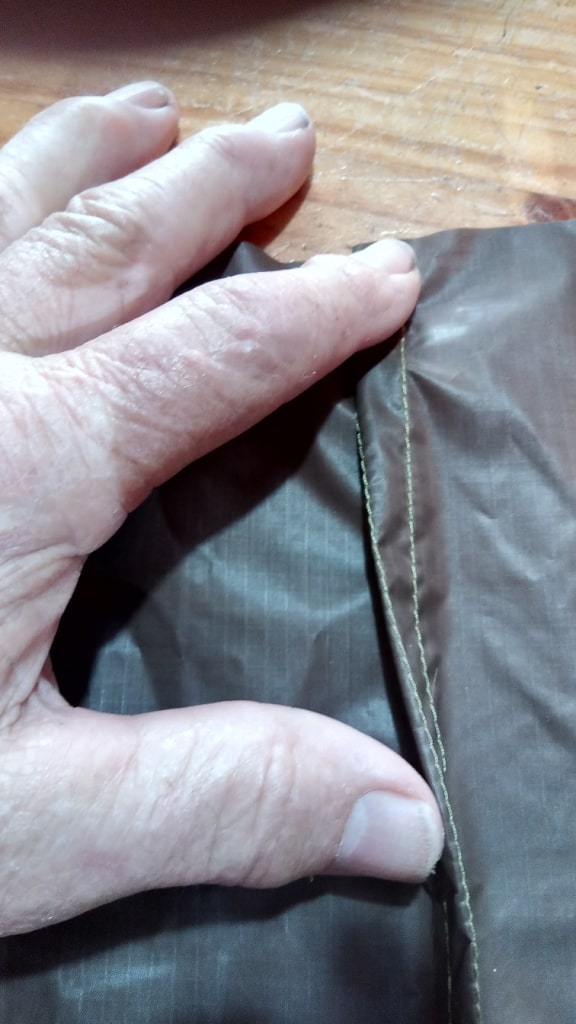
My sewing leaves much to be desired but this 1.25 oz/yd2 fabric is delicate and quite difficult to sew. All I am wanting really is a seam that will work. You will not notice the slight untidiness in the finished tent – which is coming up quite soon!
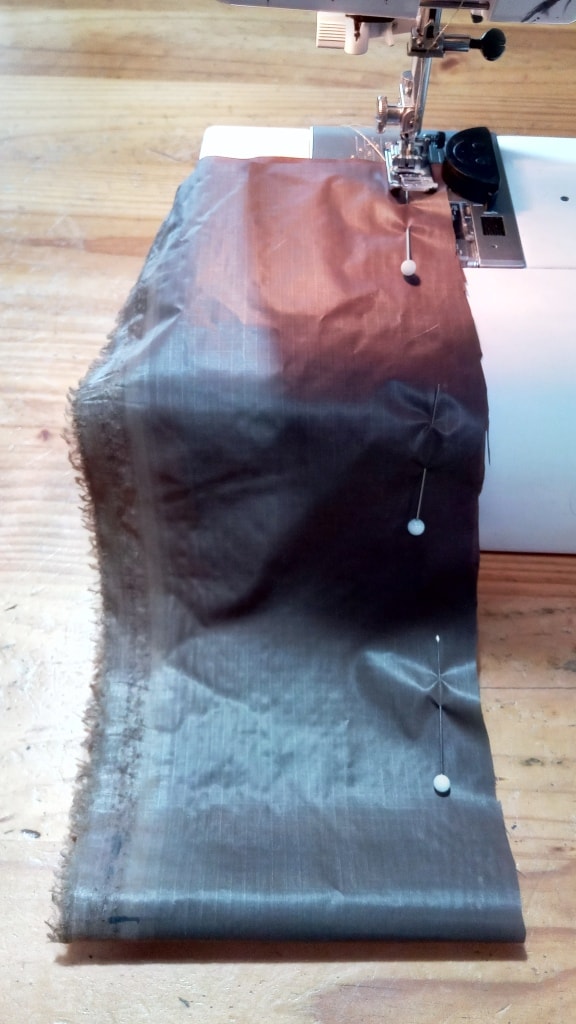
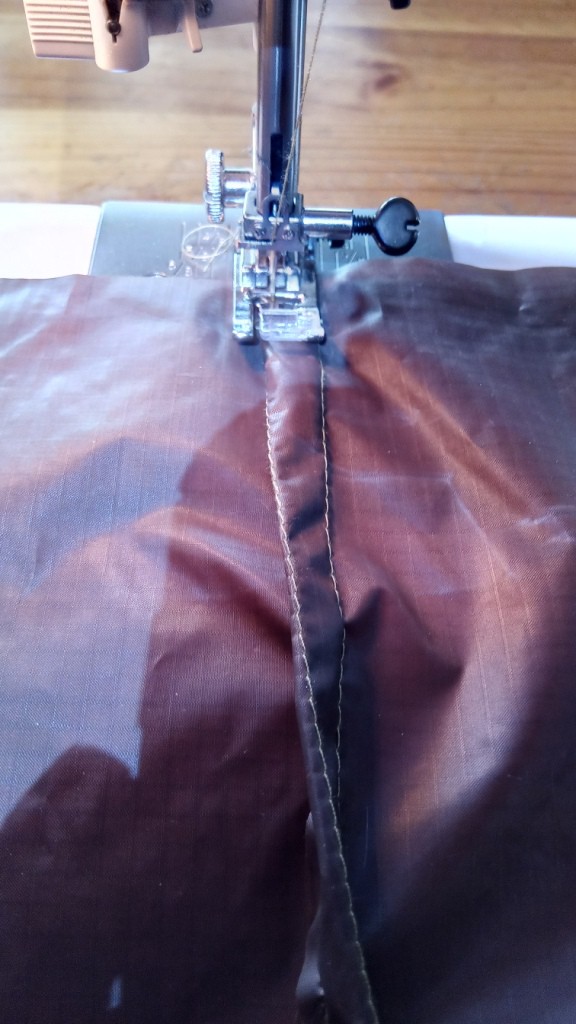
Just pin and sew your standard half inch seam as usual like this.
When you’re finished it will look like this.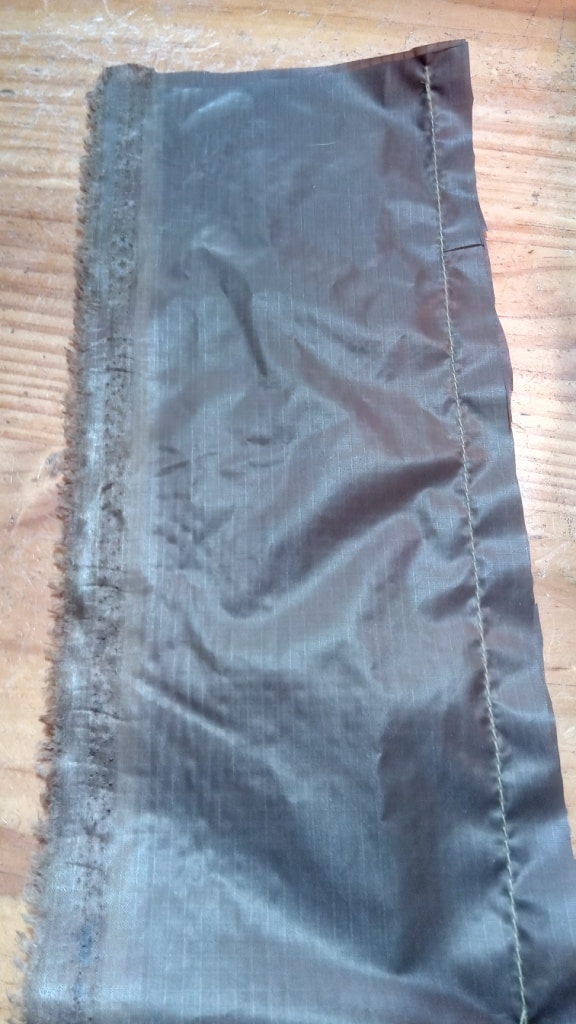
Fold the seam over to one side.
And sew another seam a little further in as shown.
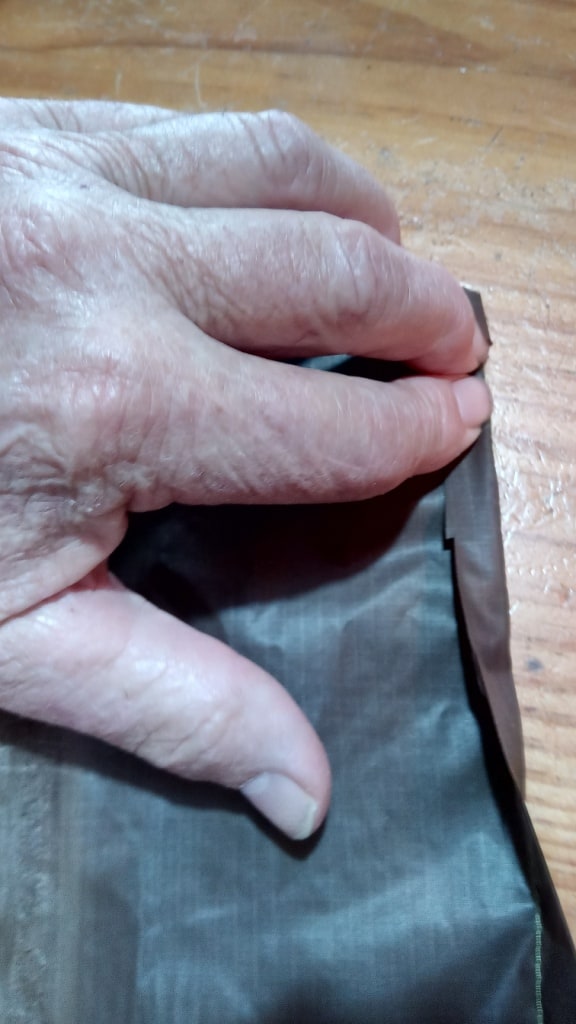
Open the fabric out. The seam stands up like this See the two raw edges on the left?
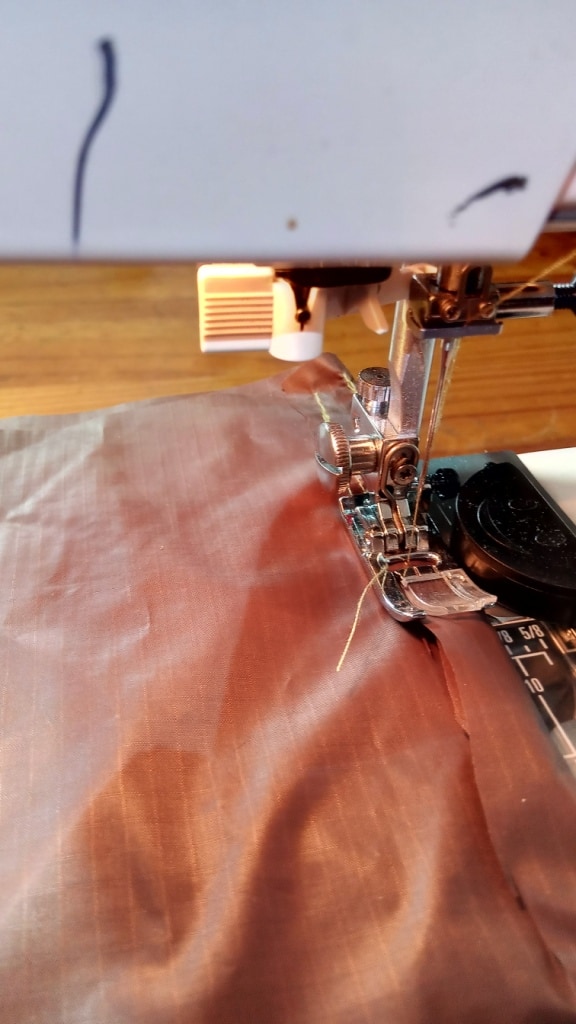
Fold the seam over the raw edges.
And sew it down over the top of them.
You should have a finished product that will look like this on one side.
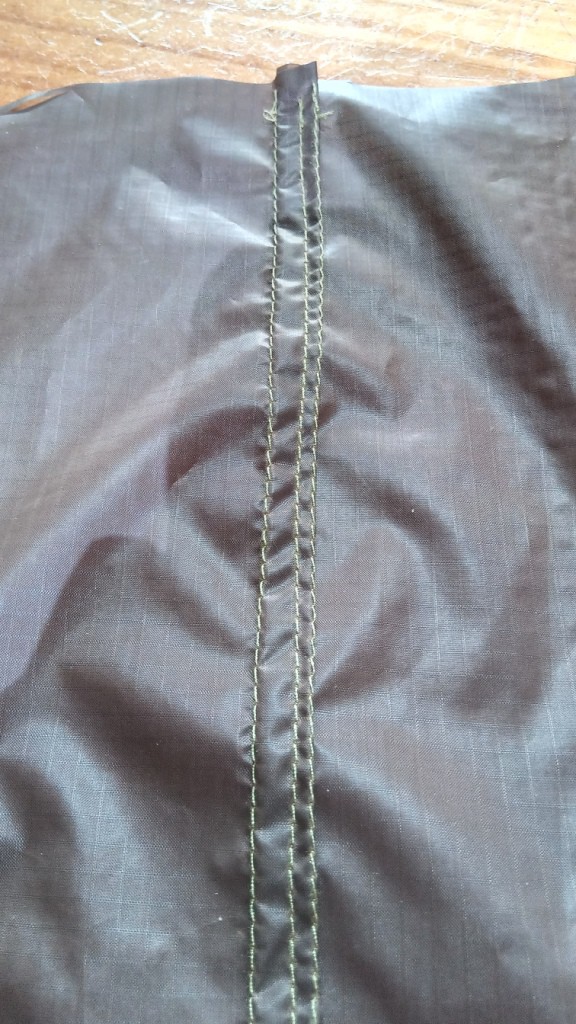
And like this on the other.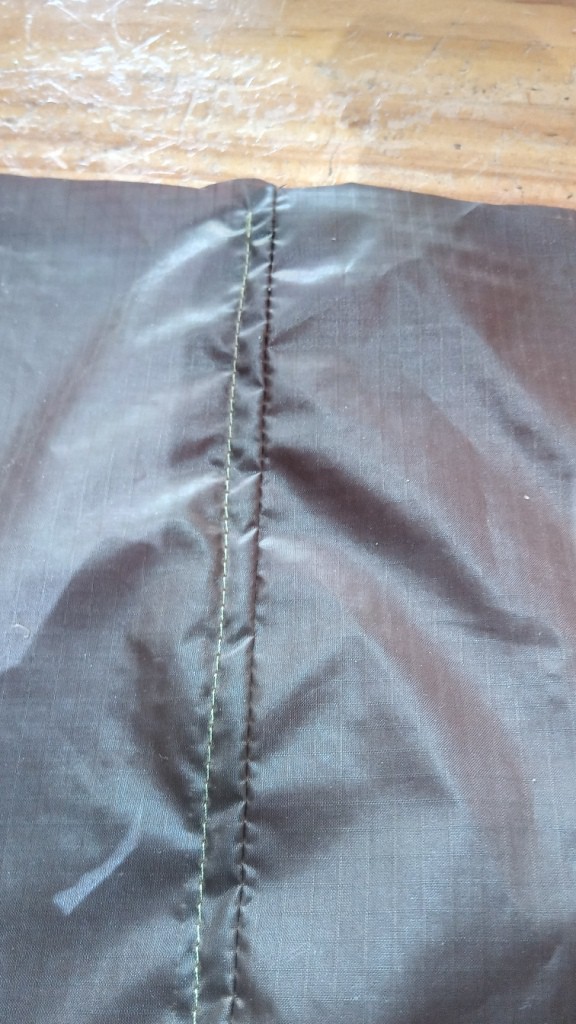
nice work – good writing you with the fat feet and hands like garden spades. I can relate. E.g. the thread is so teeny when held between my two fat fingers that look like carrots
Thank you.
Hi Steve, Your Coronavirus Easter project is progressing. I enjoyed seeing your own approach to making the french seam. It is not the traditional way (as is mine) that most describe on youtube.
It is interesting that we come up with a different method to do much the same thing. Your method does not require that fiddly cutting after the first row of stitching but it does require three lines of stitching. The seam should be stronger with four layers of fabric. However, I don’t think they need more strength than that achieved with three layers, particularly when joining straight grain to straight grain. It gets a whole lot more tricky when sewing bias grain edges (as you would know) into the seam when dealing with woven fabrics. In your method, the extra layer of bias grain in the seam will add no more strength to the two layers of straight grain.
I have yet another method, learned from my Mum, that is good for both straight+straight grain and bias+straight grain seams. It does not need the ‘extra cutting’ or ‘third line of stitching’ and it maintains at least two layers of straight grain strength in all seam regardless. Also with my method, the straight grain fabric is ‘wrapped around’ the bias grain edge and pinned together so that your fingers, the sewing machine foot and feed teeth only contact the ‘less stretchy’ straight grain surface during the first critical and difficult line of stitching. Ther lay flat line of stitching after this is so easy in any case.
https://timtinker.com/layflat-or-french-seams/
Oh, and just one more trick with seams in silnylon, I seal them with diluted silicone rubber solution (very cheap DIY). It is hard to see where it has been added, but it can soak into the stitching thread and make them very hydrophobic. My description is at the bottom of this post.
https://timtinker.com/silnylon-glueing/
Hope this makes sense.
Tim
Two comments from ‘Tims’ this morning. It is hard to keep up! I will read your article on French Seams and your article on Silnylon Glueing’. I had skimmed them. I have unfortunately finished the seam sewing and am up to the hemming, reinforcing and tie-outs this morning. With any luck I might get it erected before dark! I have a post about Waterproofing silylonghere (https://www.theultralighthiker.com/2017/02/25/waterproofing-tent-floors-and-ground-sheets/) which works well, and I have used the same mixture on seams. Mine will need very little. An artist’s brush strokes along the centre only when I make it out of that material.For now, I need to get away from the computer and get sewing. I have thought of a ‘new’ way of doing the reinforcing. New for me anyway. It should be particularly appropriate for the Tyvek and will make the tent much more secure. I will take some photos of it and post about it. I am waiting delivery of more stakes and micro cord locks so will have to ‘borrow’ some from another tent. Off to work. Thanks for your comment Tim. Cheers, Steve.