I am over carrying heavy stoves – and fuel. This one will do me. I will produce a version in titanium which will weigh about half what this one does in stainless steel, so under 20 grams! And no fuel to carry. Good enough?
This is an update of an aluminium flashing stove I made some time ago as a prototype. The new stove used less than half of a 100 mm x 1 metre roll of .1mm SS foil I bought on eBay for A$12 delivered (Aug 2020) – so an approximate cost of $6. It took about ten minutes at the outside to make using simple hand tools (and an electric drill). It should give me good service for several years.
If you haven’t any stainless steel foil, why not try utilising a large can such as an empty olive oil container (Della has just given me one). It will make two of these for free! If you oil such ‘tinplate’ stoves between use they will give years of service.
Here it is set up for alcohol burning with one of Tinny’s Gnomes inside.
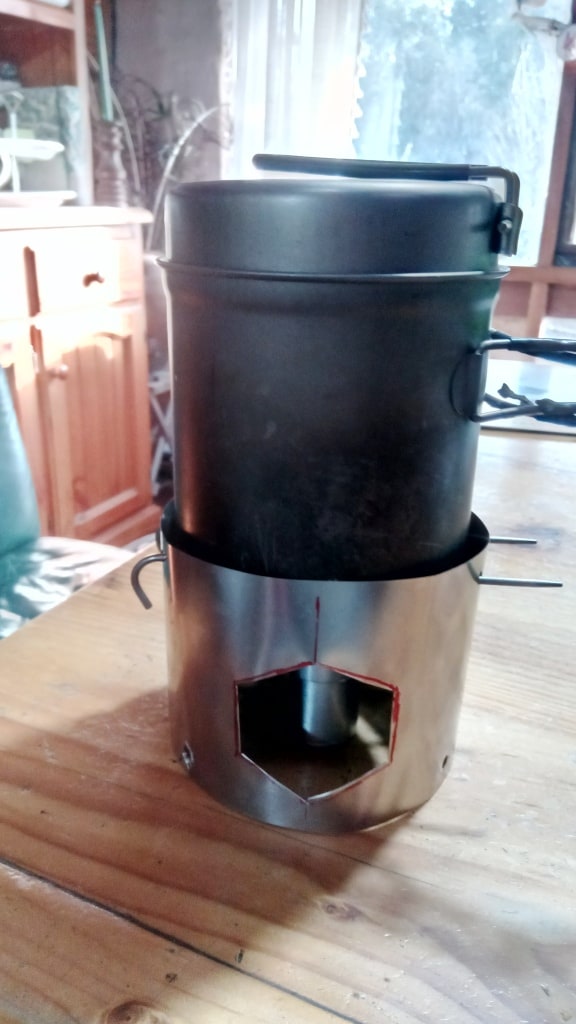
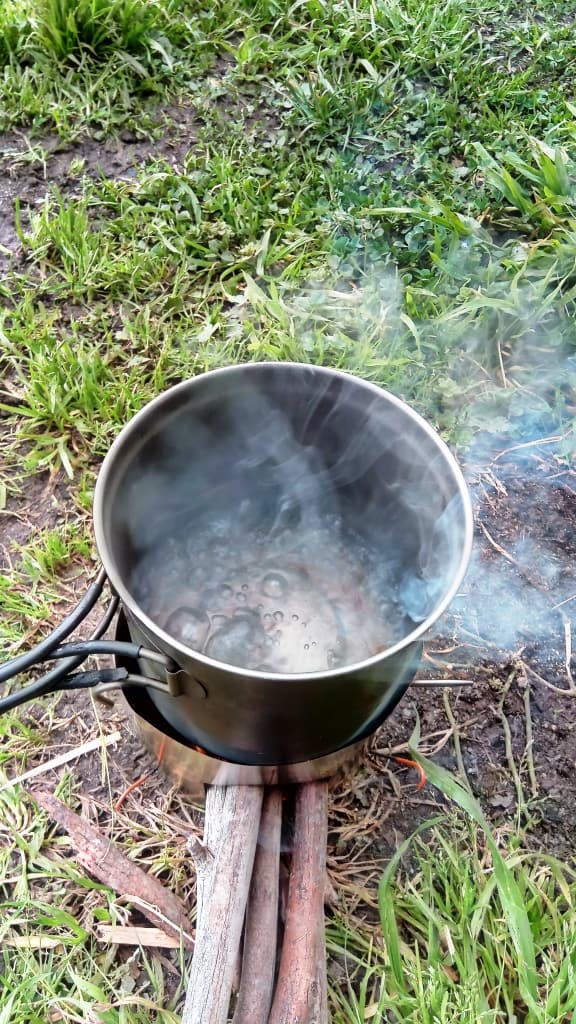
You can see I made it slightly larger than the pot so I would not need any other air inlet or outlet than the fire door and open top opening.
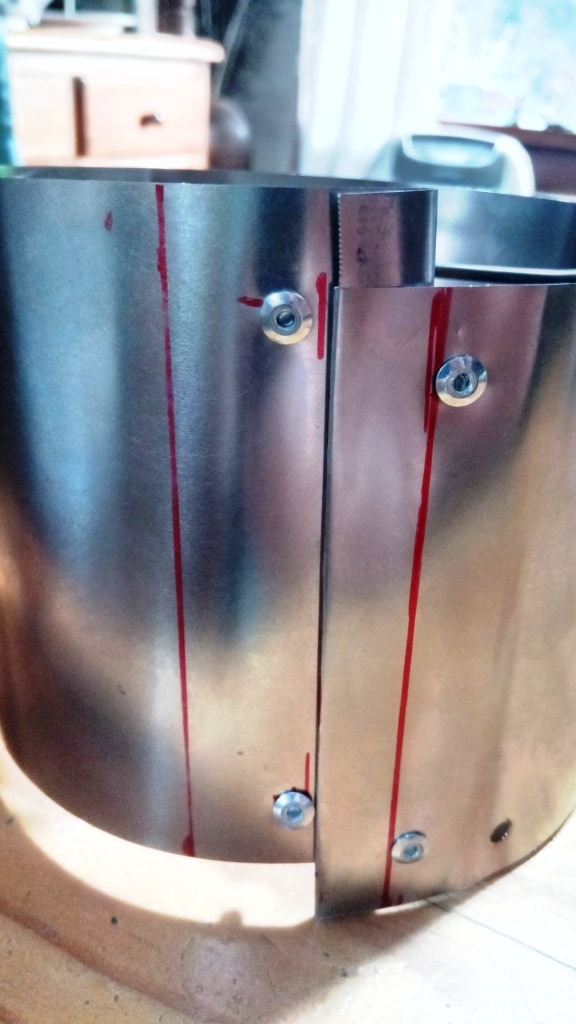
I decided to go with a ‘monkey grip’ join which is prevented from coming open by four SS pop rivets as shown. It just slides together. If you do not have a pop riveting tool you could go with the ‘piano hinge’ join I used in the original stove.
You need to allow approx 1 1/2-2″ (45mm) extra length (on top of the diameter of your pot) so the flame and smoke can exit the top and another 1/2″ (12mm) each end for the ‘monkey grip’. It is that simple!
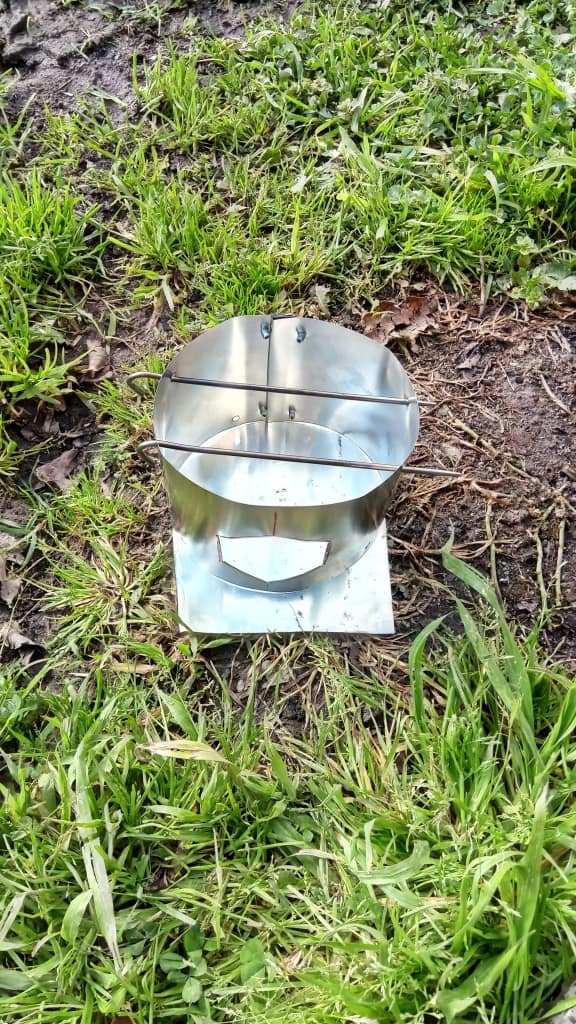
The opening is just a hexagon with approx 3 cm sides and about 1 cm up from the bottom. Just get a hold of a used tin can (eg an olive oil can) or buy some SS or Titanium foil and do some cutting an drilling. It is a pretty simple little stove. Lay a couple of pegs across the tops to assess where to drill the holes for pot support. Drill the holes for the three anchoring pegs more or less equally around the edge.
A piece of flashing will prevent the ground from being scorched and provide a dry surface on which to light your fire. I will trim this piece into a circle to fit. In fact I may cut a circle of SS foil. BTW: I have since done this. The .1mm thick SS foil disc weighs 4 grams. Titanium would weigh 2, so the stove plus floor in titanium would weigh approx 20 grams – and cost less than $5!
It was very easy to light and was soon burning away merrily. (Remember this trick) I have it pinned down with 3 of Terra Nova’s 1 gram Skewer Stakes. Bicycle spokes would work well for this purpose (likewise the pot supports, and for DIY ultralight tent stakes in general). There are plenty in waste bins.
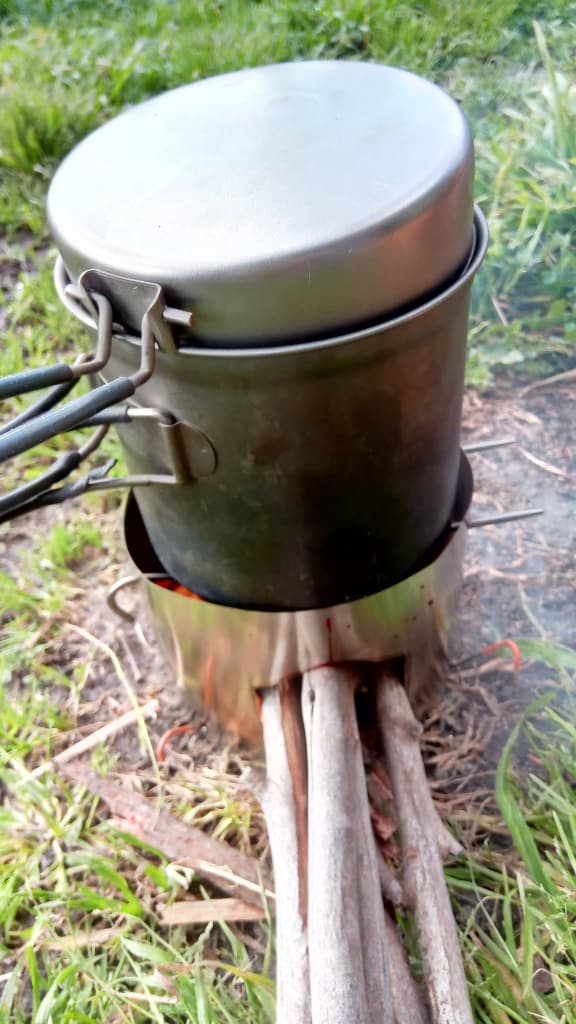
It took only about 3 minutes to boil a cup of water.
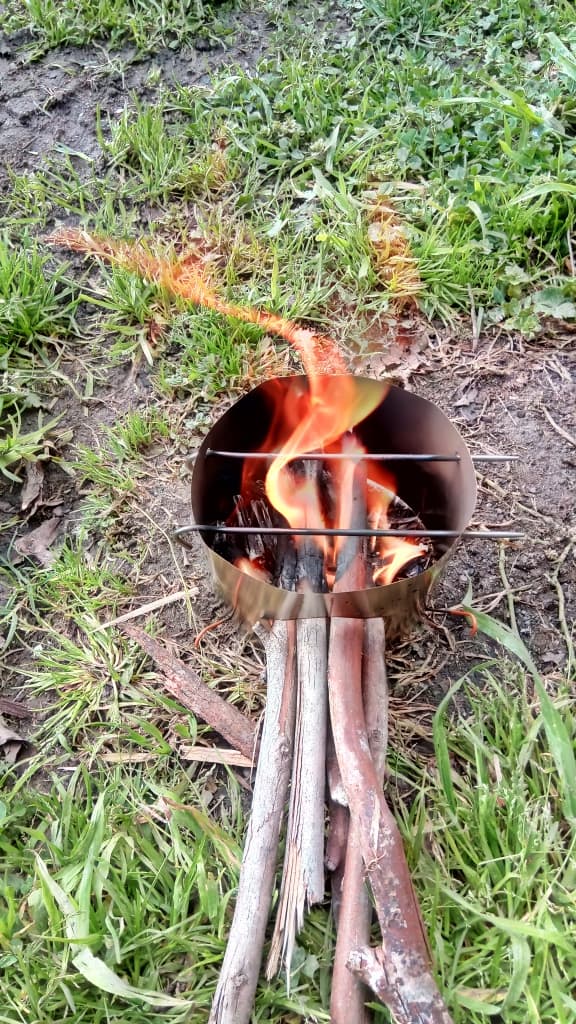
A nice clean flame. I was surprised how much warmth was produced by such a small fire. It would be quite pleasant and relatively safe at the door of your tent on a cold night. I will be making an updated version later for heating a tent and producing electricity. Watch this space.
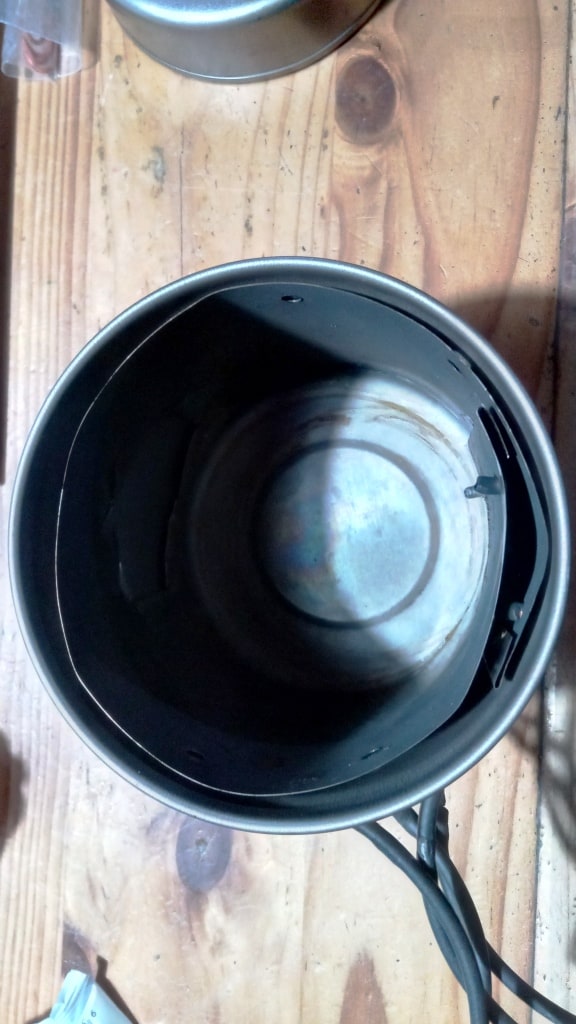
It takes up very little space in my billy. Plenty of room for other things. Space and weight are both important when backpacking/hunting.
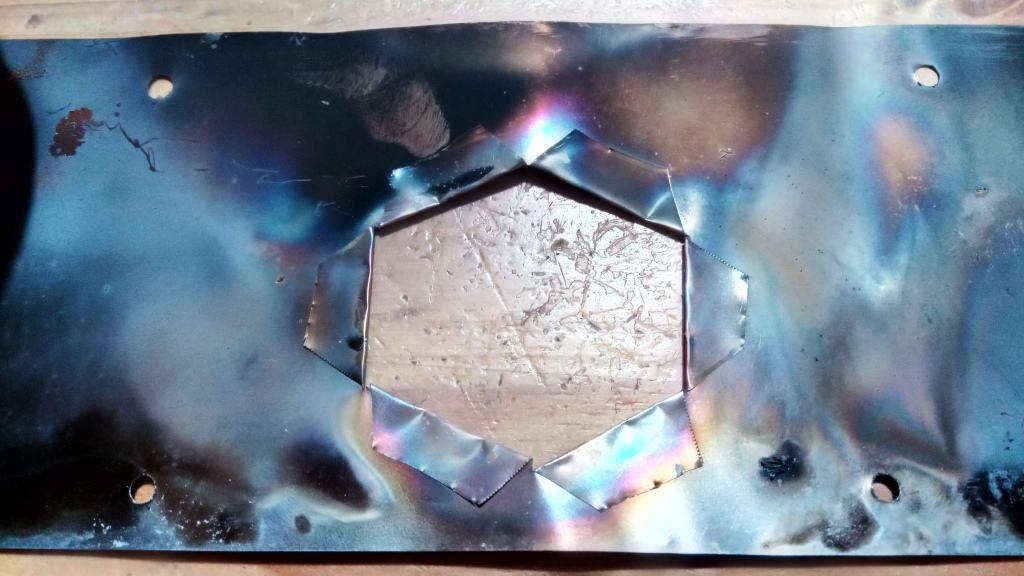
Inside the fire door. I cut the door into a hexagon shape so I could fold the edges over like this to reinforce them. I wanted the ‘V’ at the bottom so the wood would stack up in a circular fashion for better burning and so that the stove would still roll up – which would be more difficult if the opening was flat at the bottom.
You can almost feel the warmth. Those are Tito’s 5.5 gram Titanium tent pegs from Aliexpress.
See Also:
DIY Roll Up Hobo Stove or Windscreen
100 DIY Ultralight Hiker Ideas
BTW: I will be making a carbon fibre cosy for it (when the fire resistant thread comes) which will save me about 40% of my alcohol fuel. I will sew small glass beads on the inside of the cosy to hold it just out from the sides of the pot so warmth can pass up the pot but not into the air. It will be easier to make than my previous conical one.
PS: I think the best thing about this stove is that it uses just a handful of forest waste to cook your meal. A couple of hundred grams (at most) of twigs. Such material is not habitat (such as you might consider the large logs you might collect for a campfire to be). If you light it on a circle of flashing or SS foil the tiny residue of ash (about two matchbox fulls) can simply be puffed away with a couple of sharp breaths, or scattered discreetly around.
It really is an environmentally friendly (no fossil fuels, minimum resources used) and ‘leave no trace’ mode of cooking. You just have to be careful not to start a forest fire (the floor helps with that) and ensure that it is completely out before you scatter the ash. A couple of minutes at most waiting – while you eat your meal of enjoy your cuppa.
You can buy the titanium foil to make the 20 gram one from Aliexpress for A$3.87 delivered.
Brain Freeze Moment: I made the stove with an undoable join so it could fit in the billy. I now realise that it would fit just as well (and keep things cleaner) on the outside of the billy if I just joined the ends with pop rivets! If I made it out of .2 mm titanium it would weight the same as it does now, be stronger and resist crinkling better in this situation too.
Pardon my ignorance, but I don’t understand how the rivets help with the monkey grip join. How do they prevent the join from coming open? It’s not clear to me from the photos, and I’m having trouble finding more examples of this sort of join online. I love the idea and I want to make my own.
Thanks for your interest Rob, I did put two of them in the wrong way around so they didn’t help as much as I had hoped. Tow need to be tail in and two tail out. The metal comes up against the rivet and can’t go any further so it can’t spring open. Just make it without the rivet (eg in paper) then you will see what I mean. I do plan to make one using my new closure method soon (https://www.theultralighthiker.com/2022/04/05/ultralight-windscreen-or-chimney-closure/) which should be even more secure. Cheers, Steve.
Steve, The stove looks good, nice clean flame. Not much weight or space used. Does it stay smoke-free with the pot of water on top? It might work better with the pot support lower down?
Tim
Not much room to move it lower down. The roll of SS was only 4″ high as it was. I would have liked to have made it a bit higher actually. The pot plus frypan lid which it needs to fit in is nearly 5″ tall. It ‘draws’ better with the pot on top. I only wanted it to heat some food with and wondered how light it could be. It fills that bill fairly well anyway. I am thinking of making a ‘lid’ for the stove eg out of a coffee can. I could have a hole in the lid to which I could attach a chimney. I could also have a wood fuel tube going in the top. I could make a slide to cover the existing fuel door. Inside the lid I could make a diverter so that the air cannot rush straight up the chimney but has to go around a corner so that more wood gas is burned. If that worked I could place a peltier device on the top of the chimney. But for now I just wanteed a stove to cook on so I didn’t have to carry fuel. Works well for that. Cheers, Steve.
I have been experimenting with woodstoves for 15 years. I am afraid this model needs very well dried wood to work as there is no extra air input into the fire. What about adding few holes and adding a titanium mesh (Aliexpress) above them? My experience is that minimum height of burning space for a good fire is 8 cm = 3 inches.
Thank you Michal. It seemed to work well enough and i don’t want to add weight. I had deliberately omitted air holes I had on earlier models to increase air flow and heat actually. Seemed to work very well and burn very cleanly. I will be getting one of Tim’s wonderful stoves soon which burns wet wood readily. He has been experimenting for very many years and is just about the world’s foremost expert on small scale stoves. Why not check out his website: https://timtinker.com/ Cheers, Steve.
Hi Steve, I like your brain freeze term late in the post. I call it rat-tracking, where we miss the obvious alternative solution and we can do so for years before it finally clicks.
Tim
Thanks Tim. I think I used to be able to think more quickly but it seems to take longer nowadays to get my head around the best ways of doing things. Cheers, Steve.
In reproducing this design I was thinking I might make some shallow rounded cuts in the bottom (like cat cuts on a tarp) to reduce weight, Increase stability, and provide ventilation and use a bit more sheet with perforating holes for an ash tray. If I get around to testing it I’ll share!
I think your ‘improvements’ will miss the mark. First they will do very little to reduce weight (and at around 18 grams probably that is light enough). Your ‘improvements’ could not reduce that by even a gram! That is true ‘gram counting’. In addition, they would not make it burn better (quite the reverse) and would reduce its utility as a meth burner windscreen as well as increasing the fuel used when burning meths. Make a cosy instead. They would also make it much more unstable especially when there is any wind. I feel you comment is a symptom of those who want to chatter rather than do. For example, if you had tried cutting holes in this material you would have found that it is very difficult or needs special tools. The beauty of my design is that it requires neither – if you use the piano hinge alternative – just a pair of snips. The ‘improvement ‘ I suggested at the end where you simply join the ends with pop rivets would increase stability and simplicity as well as putting all the dirty bits on the outside of the pot. I have ordered some .2mm titanium sheet so I can do this and avoid crinkling the material. I will report back. Another improvement I am actually working on is adding a lid and chimney to the arrangement so I can create an air-cooled thermal generation device for charging electronics. The other alternative which I am also working on is a water-cooled TEG which just sits between the flame and the pot. You can buy high temperature TEGs here: https://www.tegmart.com/thermoelectric-modules/ You will also need a conversion circuit with USB outlet and some soldering experience.