‘Windy Old Weather’. I guess you have all heard the old sea shanty at one time or another and you know the refrain, ‘When the wind blows, We’ll all go together’.
If you are high on some solitary mountain top in the Victorian Alps and a ‘Southerly Buster’ comes rolling in off the Bight, or you are hiking the South Coast Track on the bottom of Tassie in the ‘Roaring Forties’ it is all too likely your tent will disappear into the night like the Cheshire Cat’s smile. There are ways to avoid this.
The great Pete Seeger singing (part of) it way back in 1963:
Because it is ‘traditional’ there are many versions. These are Seeger’s lyrics:
[Chorus]
In this windy old weather
Stormy old weather, boys
When the wind blows
We’ll all go together
[Verse 1]
Up jumped the herring
The king of the sea
He sang out old skipper
Now you can’t catch me
[Chorus]
In this windy old weather
Stormy old weather, boys
When the wind blows
We’ll all go together
[Verse 2]
Up jumped the mackerel
With his stripéd back
He sang out old skipper
Come haul your mean tack
[Chorus]
In this windy old weather
Stormy old weather, boys
When the wind blows
We’ll all go together
Up jumped the sprat
The smallest of all
He sang out old skipper
Come haul your trawl haul
[Chorus]
In this windy old weather
Stormy old weather, boys
When the wind blows
We’ll all go together
[Verse 4]
Up jumped the crab
With his great long claws
He sang out old skipper
You’ll run us ashore
[Chorus]
In this windy old weather
Stormy old weather, boys
When the wind blows
We’ll all go together
[Verse 5]
Up jumped the herring
Right under the lee
He sang drifting’s finished
Why bother? Catch me
In this windy old weather
Stormy old weather, boys
When the wind blows
We’ll all go together
[Verse 6]
Up jumped the herring
All broken and spent
He cried drifting’s finished
Who’ll pay the rent?
[Chorus]
In this windy old weather
Stormy old weather, boys
When the wind blows
We’ll all go together
[Verse 7]
Up jumped the herring
The king of the shoal
He cried drifting’s finished
Gotta stay on the dole
[Chorus]
In this windy old weather
Stormy old weather, boys
When the wind blows
We’ll all go together
But to continue…
Tent Shape (and positioning) is important. It is not so much the overall height or cross-sectional area of the tent (to the wind – all of which help) but also how the shape allows the wind to pass around or over it almost as if it weren’t there. (I know I am ignoring aerodynamic lift).
The dome tent was an important advance in this regard, but they also have their drawbacks. To me their biggest problem is that you have to be (basically) zipped up in them in wet weather in order to stay dry. Hiking domes are also (usually) despicably low so that you are basically crouched or in a sitting position maybe for a very long while indeed. This can be a pain.
You also usually have to crawl in an out of them (awkward for us older arthritic folk) but also therefore making it almost impossible to avoid wet knees. Because of the need to carry modular flexible poles with them instead of ‘finding’ poles on route as I prefer to do, they are also noticeably heavier.
There was nothing wrong with the ‘triangular’ (or ‘A-frame’) tent in this regard so long as it does not have a ‘square’ (windward) end. If the tent end and ridge of the tent slopes in all directions (as my ‘Grey Flyer’ tent does you will notice, the wind will quite happily just pass around it.
The other important advances of my style of tent are that you can have them open yet it does not rain in the tent and in this open configuration they can be warmed (delightfully) by a small fire on the lee side. Of course you have to be careful with this – tents are (usually) flammable.
I prefer the tent to be high enough at the peak that I can enter by simply stooping and then sitting down. In my larger ones (eg the Deer Hunter’s Tent #2 or the Siligloo) you can stand up in them. I find this very desirable on multi-day trips, particularly if you are stuck inside for any length of time (likely), for changing clothes, etc – even if they are a little heavier.
Still what I am talking about here is a tent which weighs maybe less than 400 grams all up (which the Grey Flyer will in the new fabric – currently 464 grams) as compared with (at most) 200 grams more than that. This is for a tent which can very comfortably accommodate two adults plus two dogs and gear spread all around – or three people if you are good friends. The weight includes the floor, guys, pegs, tent and stuff sack.
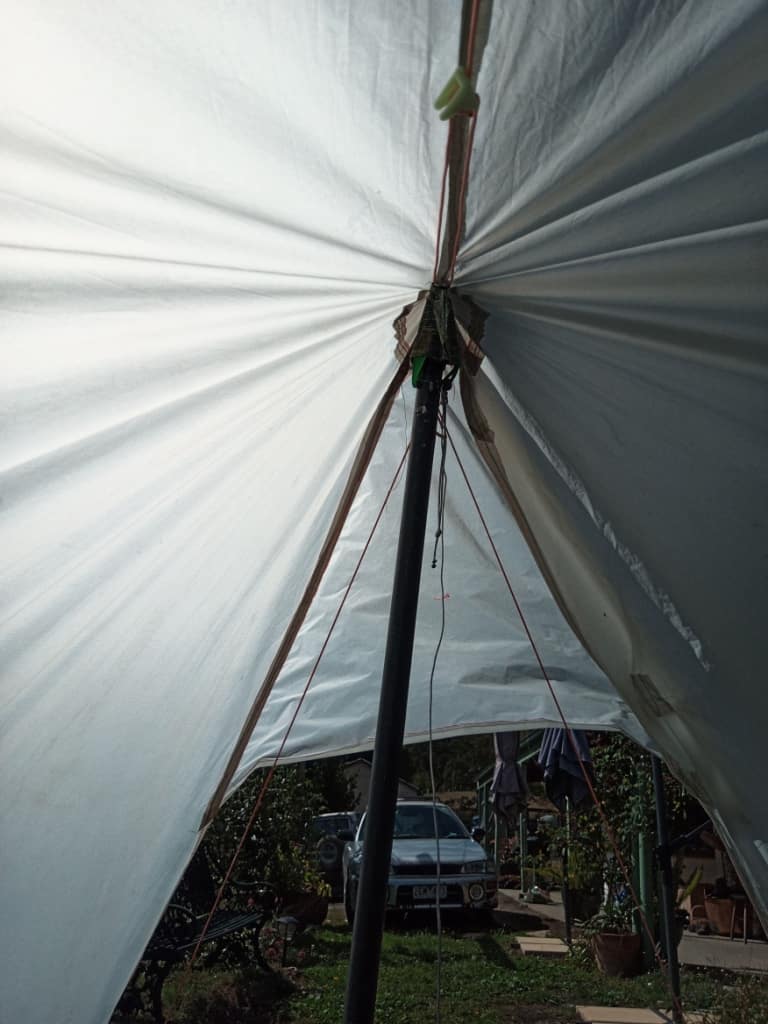
Framed vs Frameless? A side note here about the relative advantages of framed versus frameless tents might be apposite. If you want to make a kite with maximum lift then a framed box-kite is hard to beat as the photo below illustrates:
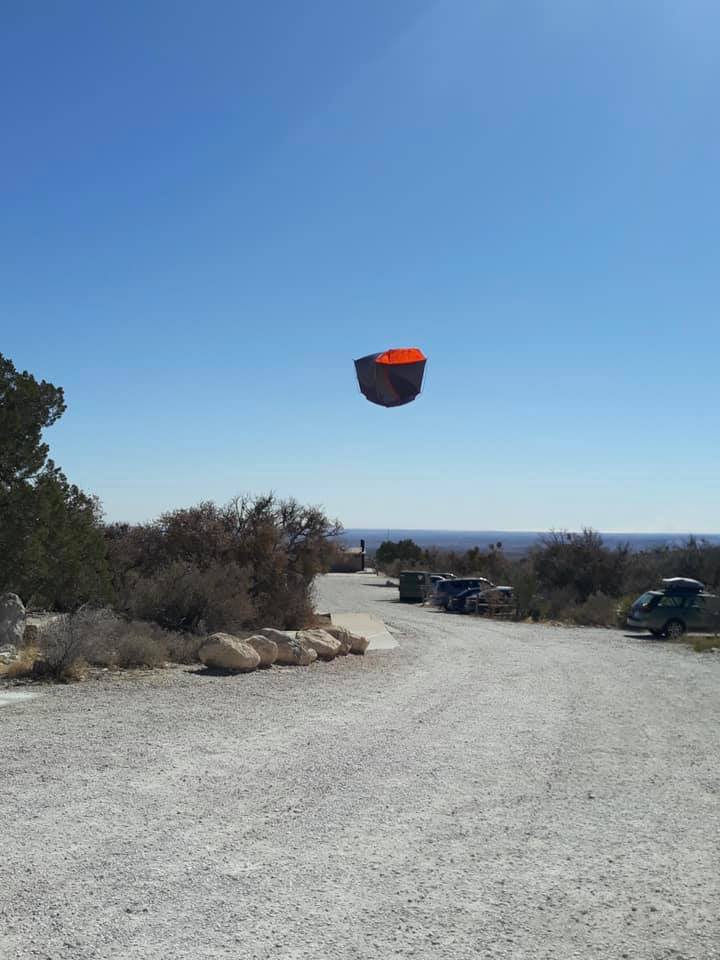
If you use a tent which just uses 1-2 poles as I do, then in seriously windy (wet) weather you can lower or even take the poles down, the tent will largely collapse and stay on the ground! It will still keep you dry in that situation. If it has ‘gone west’ like the one in the photo it will not be much good to you at all!
Tent Pegs are clearly critical, as is their positioning. You need to (be able to) identify which tie-outs are going to have the greatest load on them and concentrate your longer/stronger pegs on them. They will sometimes need something more than the simple shepherd’s hook stakes which can weigh as little as 5.5 grams each (though even lighter ones are available – down even to 1 gram each!) Also, pegs need not be expensive.
On the high stress points you might want a peg with a greater bearing area (like the j-stakes above) and/or greater length (such as some of the carbon fibre pegs) – or you may use more than one peg (eg at different angles) at each location.
NB Pegs should to be driven in for their whole length – eg the ‘tail’ on a shepherd’s hook stake needs to be completely in the ground to prevent the stake from turning and to secure the maximum ground purchase. Pegs can also be buried/driven under earth and rocks. Loops of cord attached to the holes in many (eg j) pegs can make this easier/more practicable. A safety anchor (below) will offer even greater protection.
See how these two shepherd’s hook stakes are driven far enough into the ground so that the ‘tail’ is also well buried. I normally drive them in another centimetre (1/2″) so only the string is visible but then you would not see them for the photo!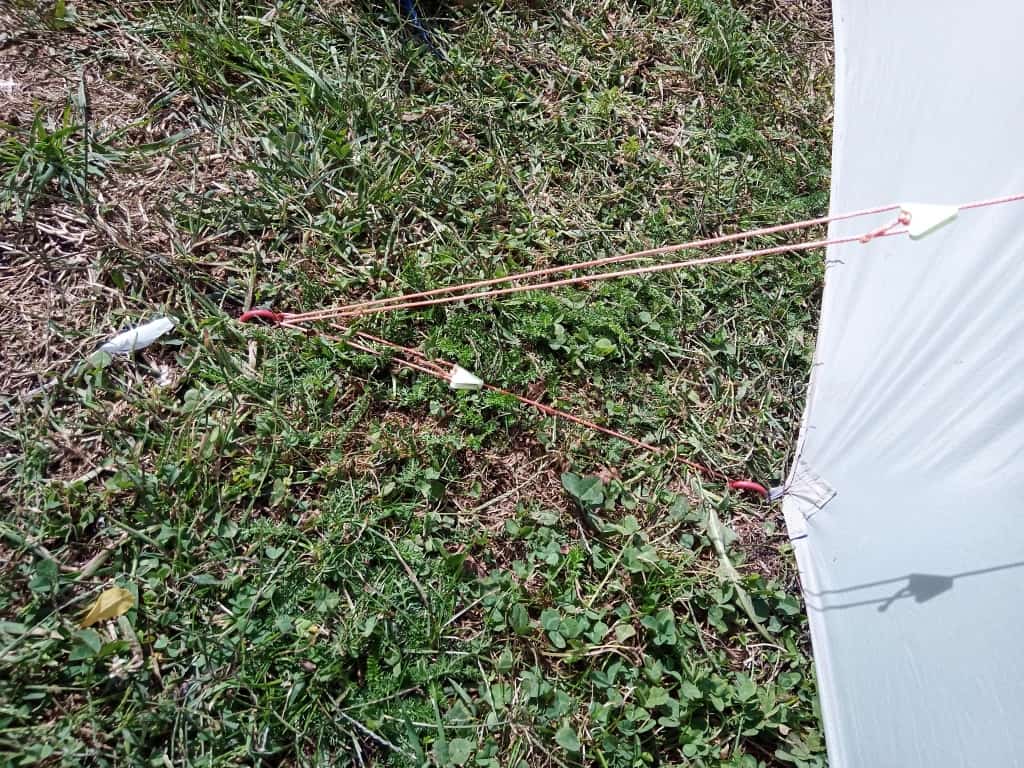
Another view. The top guy is attached to a side tie-out to prevent the material of the tent from blowing in on you. It also adds security.

The angle you drive the pegs in is also critical. First of all the guy should not be too steep. It should not be more than 45 degrees to the horizontal, preferably less. If it is more the vertical force on the peg will be so much greater the peg will almost certainly come out of the ground whatever you do.
A longer guy (so long as there is zero stretch/whip) will resist the vertical force more because it is at a lesser angle (than 45 degrees) to the horizontal.
You should drive the peg in at a little (eg 10 degrees) less than ninety degrees (ie towards the tent) compared with the direction of the guy. If you drive it in more than ninety degrees it will be much easier to pull out. If you drive it in too flat/horizontal it will be inclined to break out of the ground. There is a perfect compromise. Experiment a little; you will se what I mean. You can place two stakes at approximately sixty degrees to each other (to the side) to gain extra purchase if necessary.
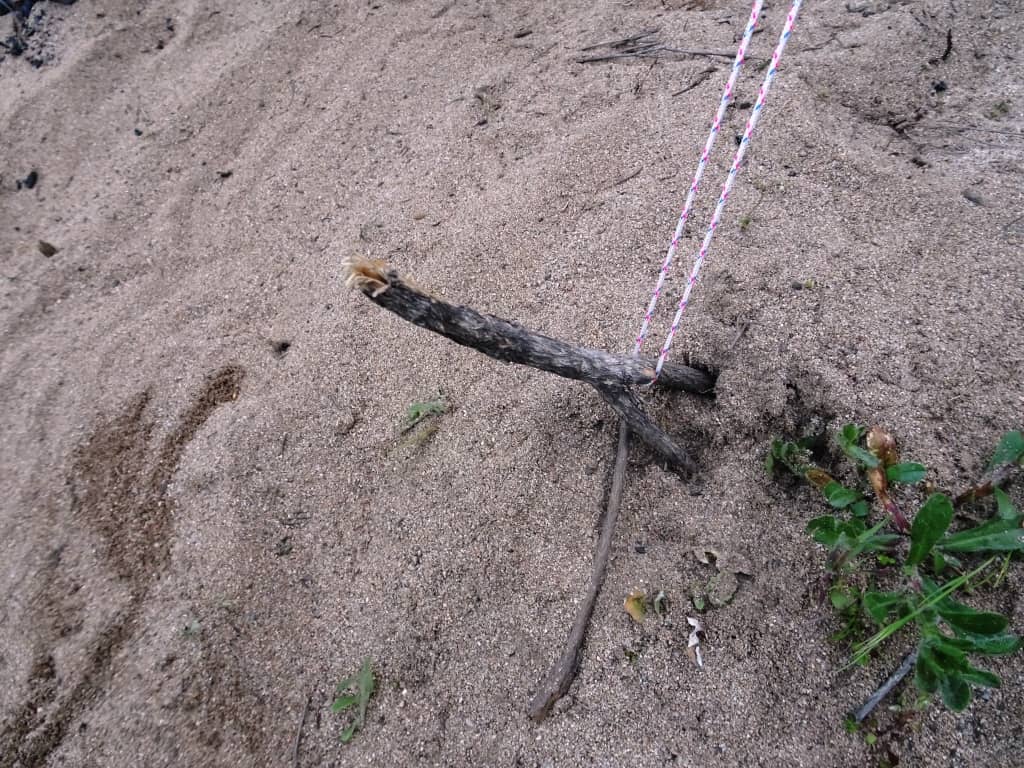
NB: You don’t actually have to carry tent pegs. In the past practically no-one did. They can quickly and easily be fashioned from forked branches – I realise this may offend against some folks’ ‘leave no trace’ prejudices (which might well be appropriate in areas where many are hiking – but best to avoid such places really). Also not every relevant when we burn a million or so acres a year with wildfires in our poorly managed public lands.
One advantage (aside from saving weight/money) of such impromptu tent pegs is that they can be much, much longer and sturdier. You can also use more than one per guy. You will likely need them in sand anyway as below:
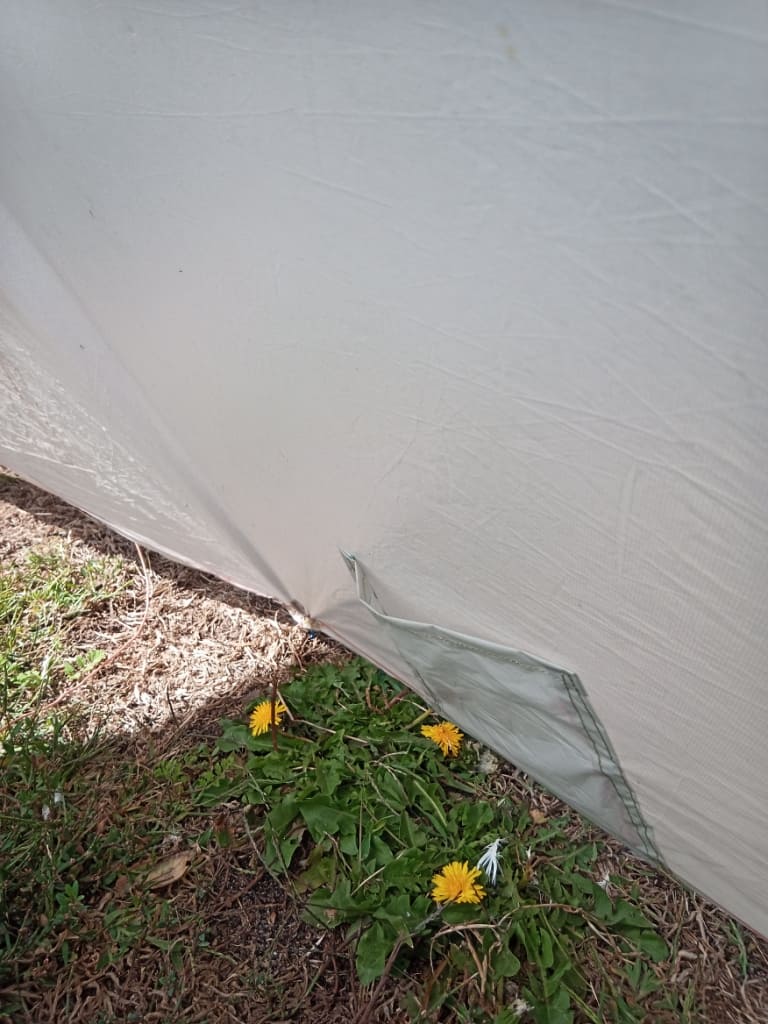
Tent tie-out: It is quite easy to sew a tie-out like this to the wall of your tent approximately half way up from each bottom tie-out to the peak. It will help prevent the tent material pushing in against you in strong winds, but it also helps prevent the tent from lifting. It is connected to the outside ‘safety anchor’ (see photo below).
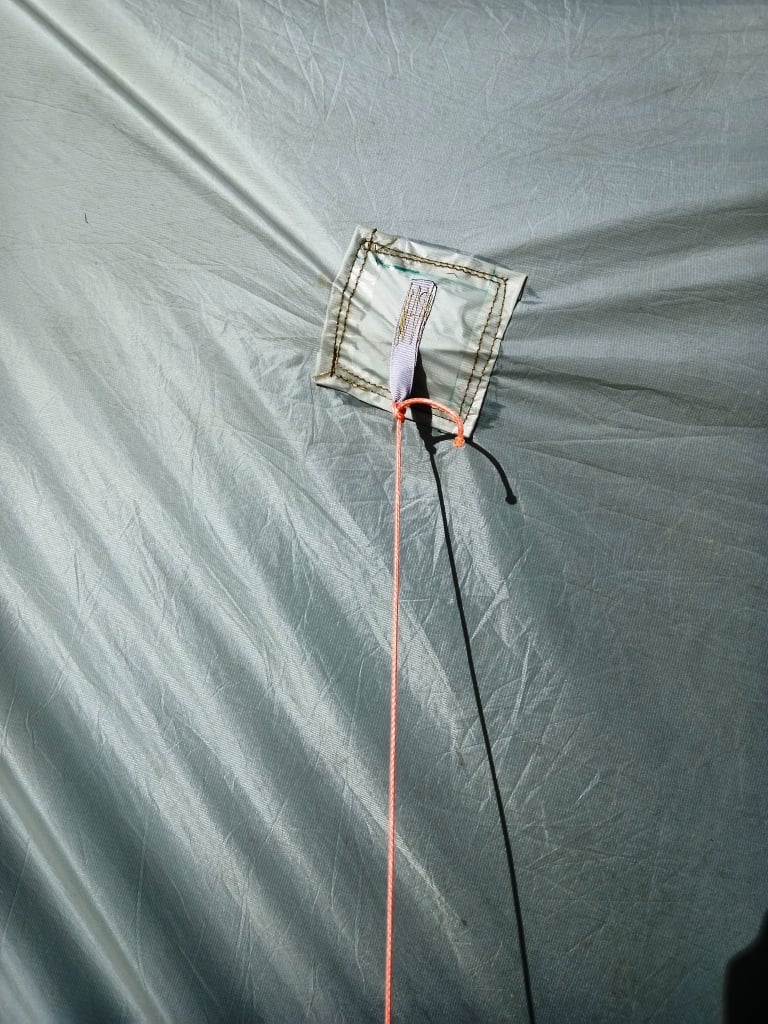
Tent Safety Anchor: This is just an extra length of guy with its own cord lock. See how it anchors the inside peg so it can’t move inwards towards toe tent or upwards. It adds very little weight to your tent to add this feature to all your guys, perhaps 10- 15 grams, but it will be a godsend in windy conditions. It is the string equivalent of a framed tent just as my string tripod is of a real tripod.
Additional Features: Here is another feature of my tent which most don’t have. I have a reinforcing piece of dyneema to prevent wear on the tent fabric from the pole (in windy conditions etc) but it also includes a ‘tube’ of material to locate the pole (so it can’t slip sideways or back and forth) and a drawstring secured by a micro cord lock so the tent can’t lift off the pole. Both of these features are important in windy weather.
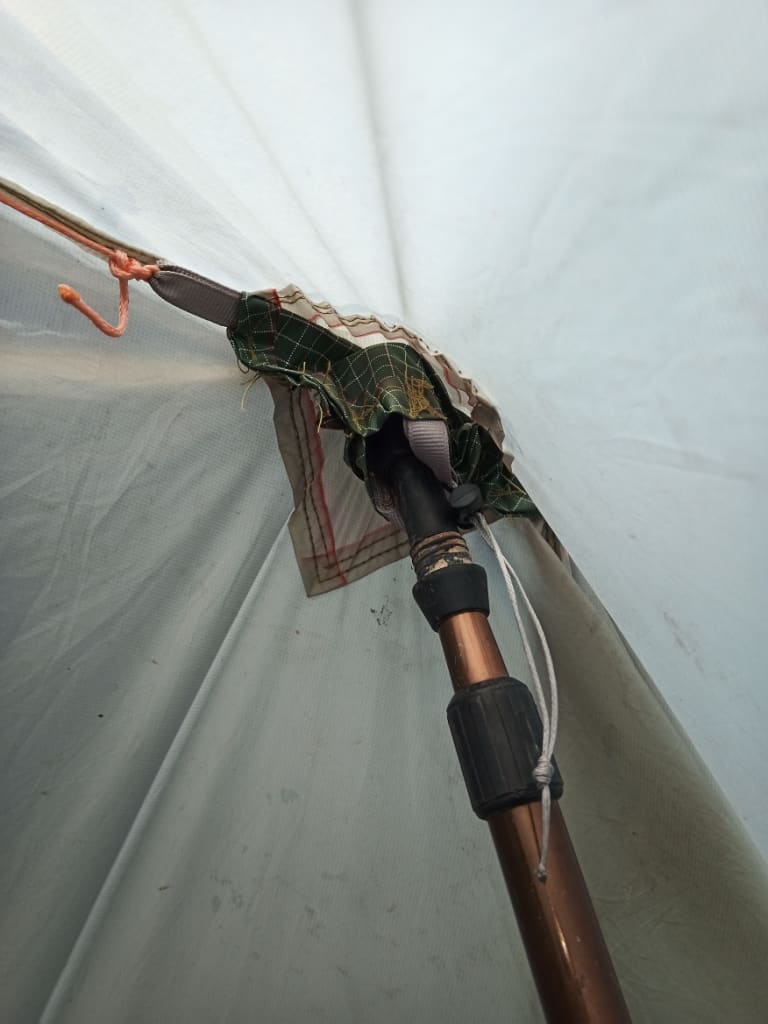
I am refining this ‘pocket’ so that it will take additional (side) poles which can be secured at the bottom by looping the ‘tent’ anchor around them before pegging it out. In this way you can have a fully framed tent without carrying any poles at all – just a small saw.
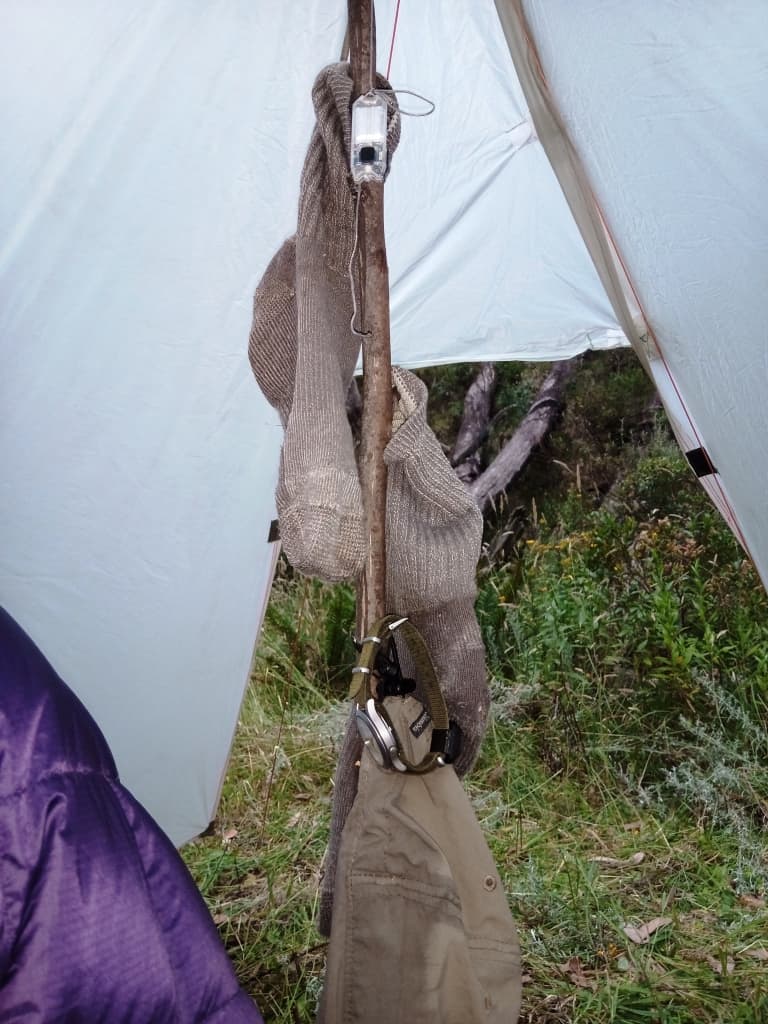
This is the front pole attached similarly. The cord going back towards the rear of the tent is an internal clothes line. This is a very useful feature which most tents don’t have. It also helps tauten the ridge line. I have added the small triangular flap at the front to give quite a bit more dry area – several square feet.
Again one of the useful things about using bush sticks as tent poles is that you can hang things on them.
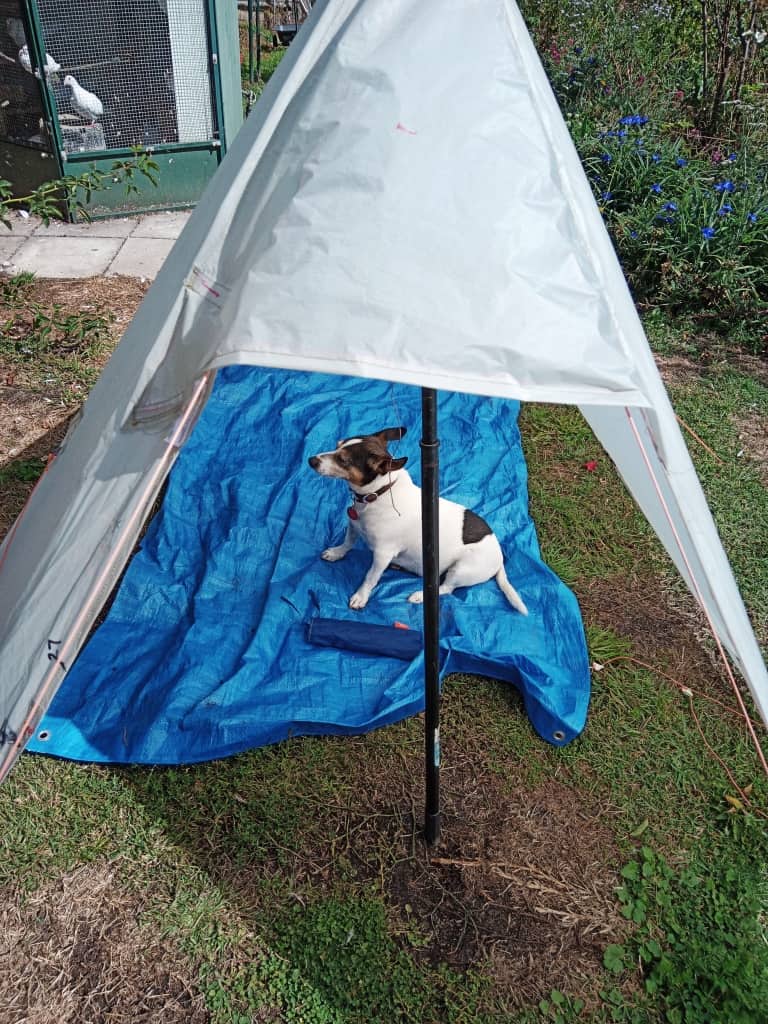
Here is that flap open so you can get in and out of the tent more easily. (Spot is anticipating another camping trip soon!)
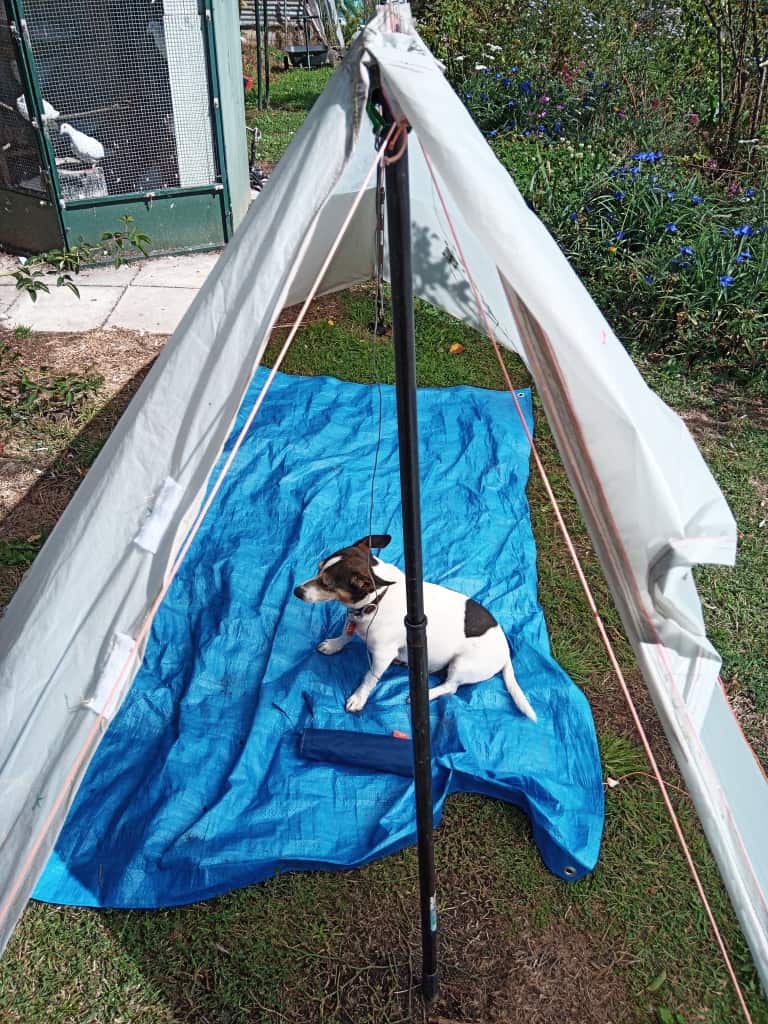
And here it is closed. The flap is approx 2 square feet (.22 of a square yard or .25 of an ounce in this fabric or 7 grams – yet it adds an additional dry area approximately 6-8 square feet. Well worth it. It is where my feet are when I am sitting in the tent in front of the fire of a night.
Every tent should have a couple of night-time pockets like this up near the head end for you phone, glasses, head torch etc.Also simple to add. These are about 6″ by 6″ (a little on the small side actually). The two together are one square foot or about 3 grams in toto.
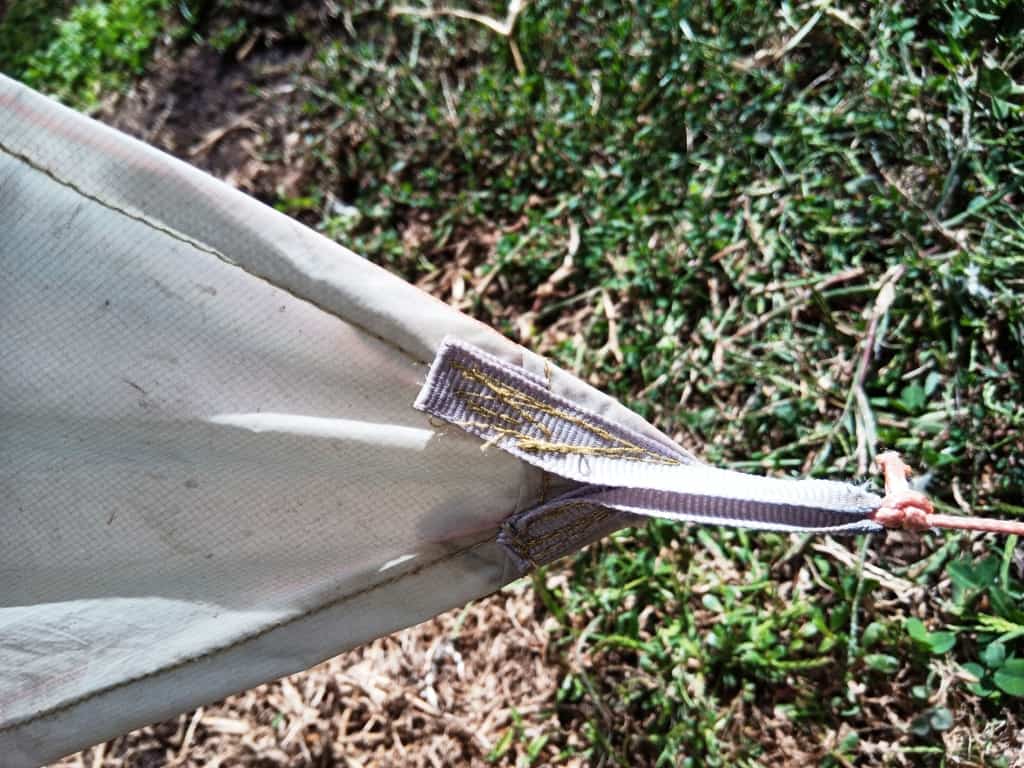
This is how I do my tie-outs now. There is a reinforcing patch underneath so that the gross-grain is sewn through four thicknesses of material. This arrangement tautens the silnylon very well particularly along the catenary cut sides. I think it is stronger and neater than the usual patch with the gross grain sewn up the middle.
See Also: